CircleCI
Overview
CircleCI is a popular CICD (continuous integration continuous delivery) tool which integrates with your application's GitHub repository. With CircleCI you can quickly spin-up resources to run your application's unit tests under production environment conditions.
Prerequisites
- You should have an account with GitHub or another cloud-based code repository.
- You should have an account with CircleCI. You can elect to sign-up with single-sign-on using GitHub (recommended).
- You should have created an Astra Database
We will need the
database idandregionof your Astra DB instance. - You should have an Astra Token for your application.
- This example will be for a Java / Spring Boot project, but the process here is not language dependent.
Steps
1 - Enable your project.
When you view your dashboard on CircleCI, click on "Projects" in the left nav. This should display all of the repositories from your GitHub account. Find the project that you want to enable with CircleCI, and click "Set Up Project."
You will then see a popup asking you to designate or create a new CircleCI config.yml file. Choose the option to "Take me to a config template that I can edit."
Next, you will be prompted to pick the project's language and/or dependency manager. This will help to generate the config.yml file. For this example, I will scroll down and select Java (Maven).
2 - Configure your project.
You should now be able to see the code to the config.yml file in the bottom-half of the screen. You can also get to the config editor point from the "Projects" screen, by clicking on the 3 dots to the right of a valid, CircleCI project repository, as shown below in figure 1.
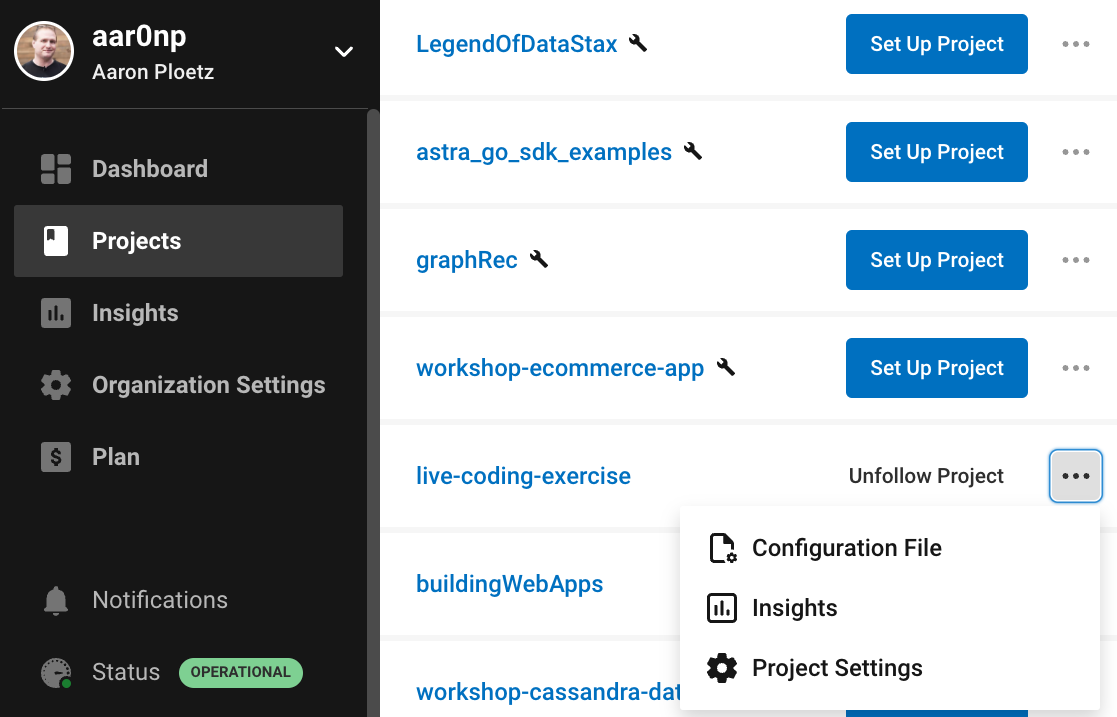
Figure 1 - How to find a project's configuration file editor from the "Projects" screen.
Here is a sample CircleCI config.yml. This file can also be found in the following repository and branch: https://github.com/aar0np/live-coding-exercise/blob/circleci-project-setup/.circleci/config.yml
Sample circleci/config.yml
# version of CircleCI pipeline process engine.
version: 2.1

# Define jobs
jobs:
  build-and-test:
    docker:
      - image: cimg/openjdk:17.0.4
    steps:
      - checkout
      - run:
          name: Maven build
          command: mvn -B -DskipTests clean package
      - run:
          name: Test
          command: mvn test

# Invoke jobs via workflows
workflows:
  project-workflow:
    jobs:
      - build-and-test
In this case, we are using the Astra Spring Boot Starter Kit to connect to Astra DB. Because of this, running a simple mvn test is enough for our project to open a test connection out to your Astra database.
3 - Setting Astra DB connection properties.
From the "three dots" menu on the project page that we used in Step 2, you can see that there is an option called "Project Settings." Click on this option, and then click "Environment Variables" on the left nav of the next screen. Here you can create variables for credentials, tokens, and other sensitive properties for your project.
Click the blue "Add Environment Variable" button to enter both its name and value. For my application, I needed to add the following environment variables:
- ASTRA_DB_ID
- ASTRA_DB_APP_TOKEN
- ASTRA_DB_REGION
- ASTRA DB KEYSPACE
A portion of the environment variable values will be obscured by Xs. Note that you cannot edit or read existing environment variables. For security reasons, they can only be deleted and re-created.
4 - Running your CICD pipeline.
With the config.yml in place and environment variables defined, you should now be ready to run your pipeline. Go back to the config editor, and verify that your config.yml shows "green" on the bottom. If there is an error in the YAML, it will be in red. From here, click on the name of the job defined in your config. For my project, it will be the "build-and-test" option toward the bottom, as shown in figure 2.
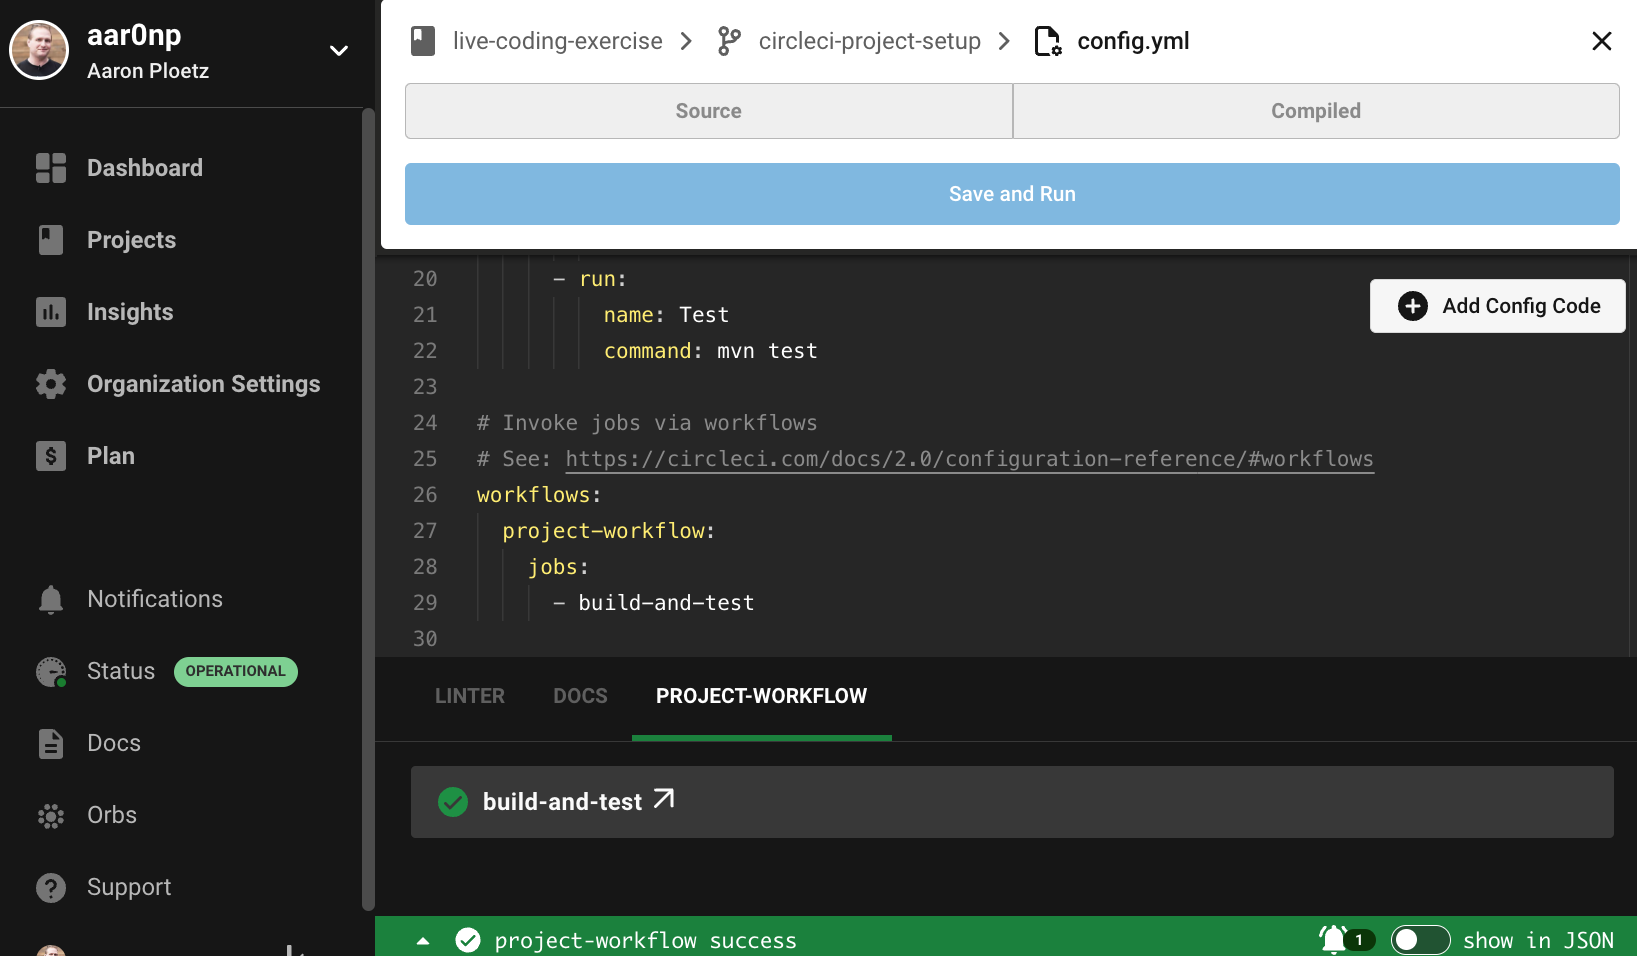
Figure 2 - Configuration file editor screen. Notice that my job name "build-and-test" is a clickable link at the bottom.
Clicking on the job link will take you to the screen where you can run/rerun your pipeline. Simply click on the "Rerun" button and select "Rerun workflow from start" option. Assuming everything is properly configured and your Astra DB is not hibernated, the pipeline should complete successfully. If it does not, click on the job link to see the individual steps, and open the failing step to troubleshoot the problem.