📖 Reference Documentation and Resources
Overview
AWS Glue is a serverless data integration service that makes it easy for analytics users to discover, prepare, move, and integrate data from multiple sources. You can use it for analytics, machine learning, and application development. It also includes additional productivity and dataOps tooling for authoring, running jobs, and implementing business workflows.
With AWS Glue, you can discover and connect to more than 70 diverse data sources and manage your data in a centralized data catalog. You can visually create, run, and monitor extract, transform, and load (ETL) pipelines to load data into your data lakes. Also, you can immediately search and query cataloged data using Amazon Athena, Amazon EMR, and Amazon Redshift Spectrum.
AWS Glue uses the Astra JDBC Driver to connect to Cassandra as the storage backend. The Java driver itself supports connections to Astra DB natively.
Prerequisites
This tutorial will take you through the process of connecting your Astra database to Glue. This process is somewhat extensive, so please take care to read all of the instructions carefully.
- You should have an Astra account
- You should Create an Astra Database
- Type: serverless
- Database: astraglue_db
- keyspace: astraglue_ks
- You should Have an Astra Token
- You need an AWS account with permissions for Glue, S3, IAM, and the AWS Secrets Manager
Step 1 - Setup
✅ Step 1.1: Put data in your database
- From the Astra homepage, select your astraglue_db database from the list on the left hand side.
- Click the Load Data button at the top of the page.
- Download this sample CSV file.
- Drag the CSV file onto the file drop area and then click the Next button.
- Scroll to the bottom and choose a partition key (country_name).
- For "Target Keyspace" use the astraglue_ks you created as a prerequisite.
- Click "Finish".
- Move on to the next steps, the upload should be done before you need the data.
✅ Step 1.2: Create Role in IAM
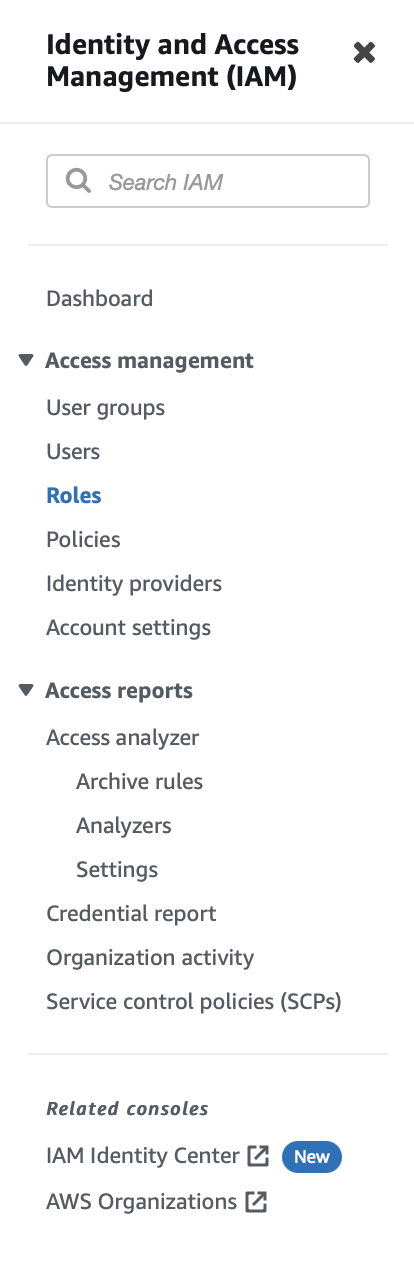
- Open the AWS Identity and Access Management console.
-
In the left hand column, select Select Roles.
Show me!
-
On the right hand side, click the Create Role button.
-
For your Trusted entity type, choose AWS service. In the "Use cases for other AWS Services" type and select "Glue".
-
Select Next.
-
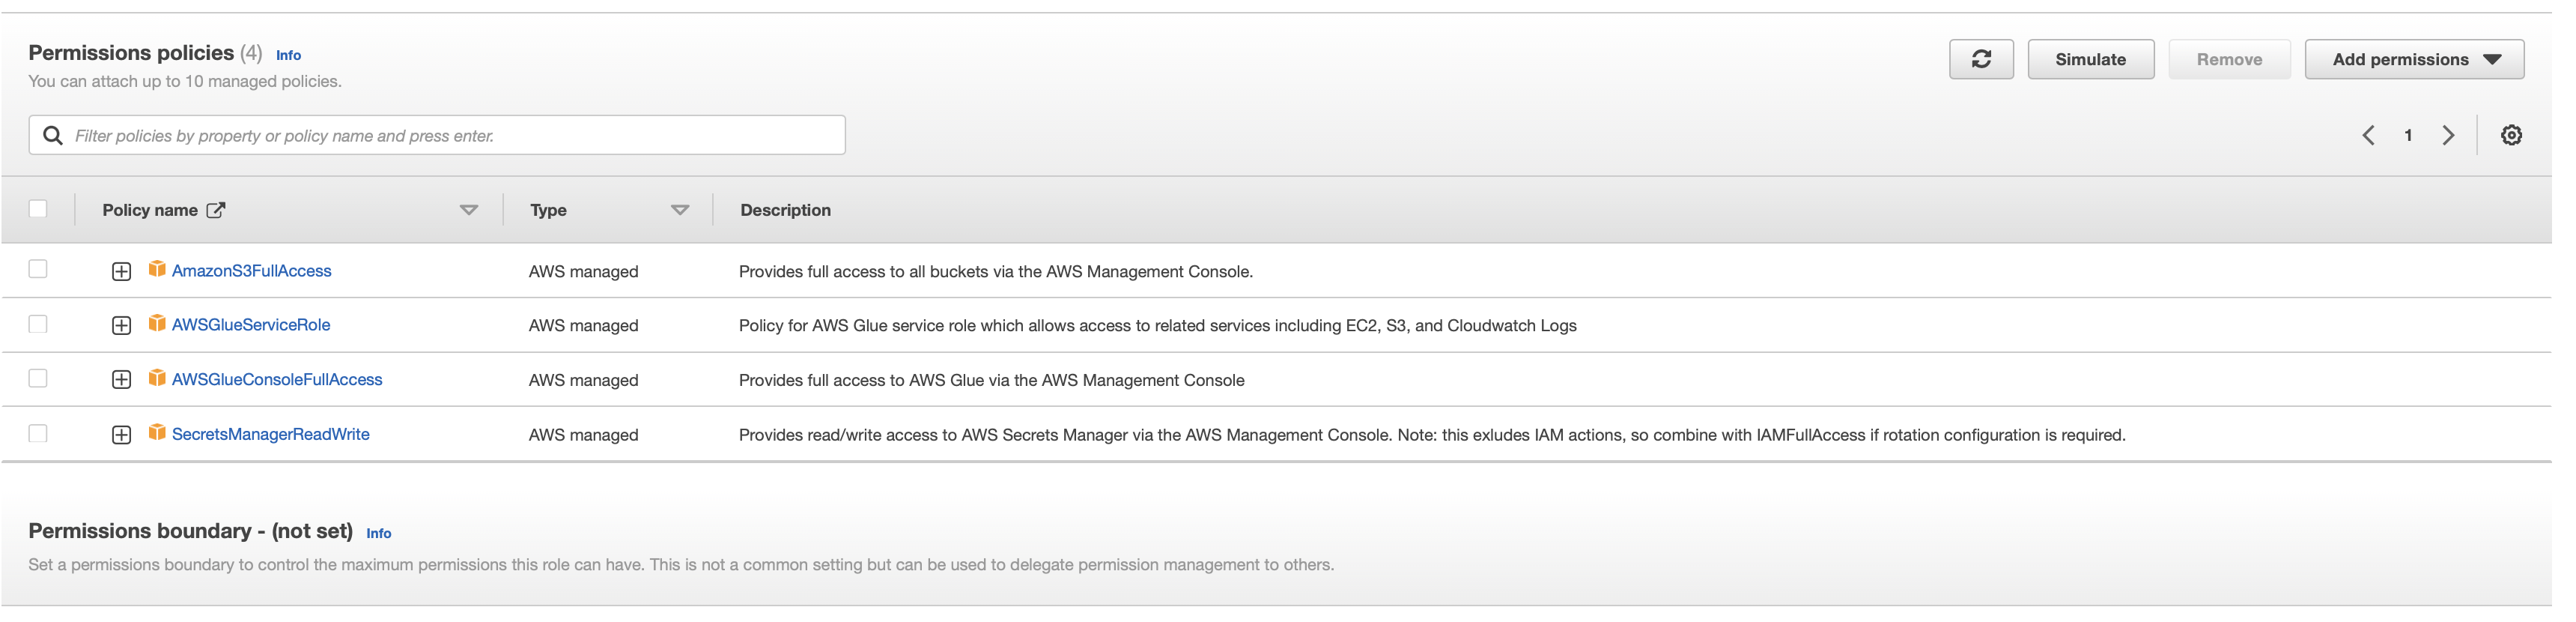
On the Add permissions page you will need to search for a few different permissions. You should select the following:
- AmazonS3FullAccess
- AWSGlueServiceRole
- AWSGlueConsoleFullAccess
- SecretsManagerReadWrite
Show me!
-
On the Name, review, and create page, choose a name for your role (For example purposes I will use AstraGlueRole), then scroll to the bottom of the page and click the blue Create role button.
✅ Step 1.3: Setup JDBC Driver in S3
- Download Astra JDBC connector jar from Github.
- Open the S3 Console.
- Click the Create bucket button on the right hand side.
- Choose a bucket name - this must be unique across all accounts so you will need to pick something unique to you.
- Choose which type of permission model to use. I chose here to use ACLs as they are easier for managing access to buckets and their contents.
Show me!
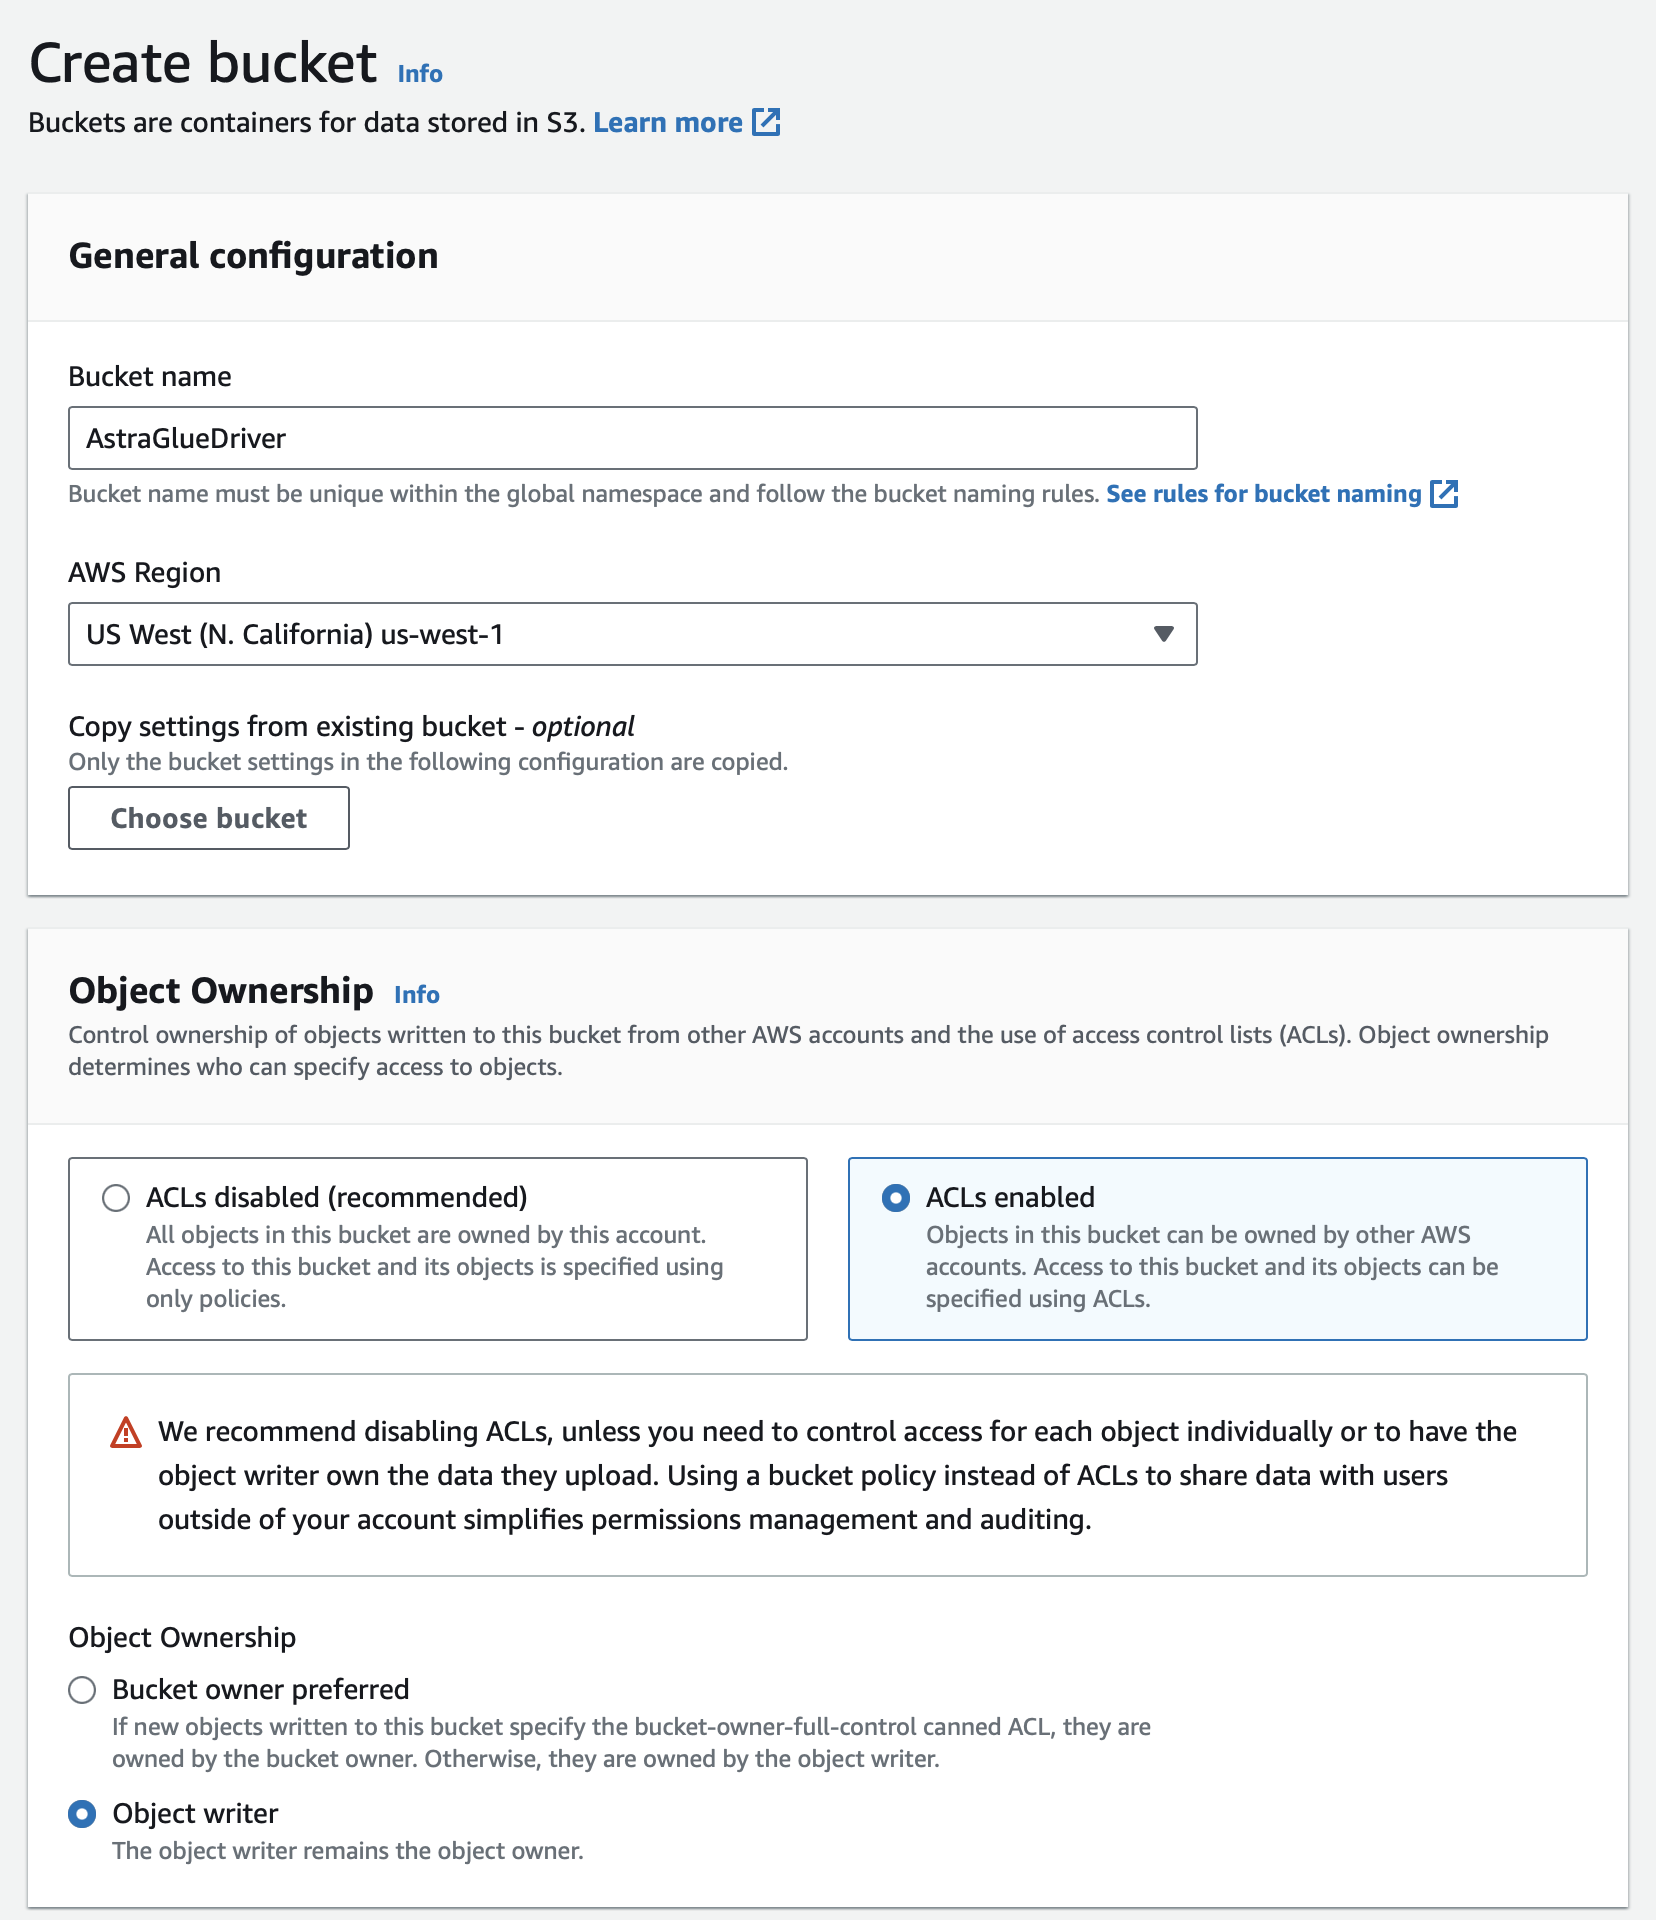
- Scroll to the bottom and click the orange Create bucket button.
- Open the bucket by clicking its name on the bucket listings.
- Click the Upload button and follow the steps to upload the driver you just downloaded.
- Once that's done, from the Objects page for your bucket in S3, click on the driver.
- From here you can copy the S3 URI, which you will need later, or you can get it when it's needed.
✅ Step 1.4: Secrets Manager
This assumes that you have gone through the process of getting an Astra token for your database.
- Open the AWS Secrets Manager console.
- Click the orange Store a new secret button on the right hand side.
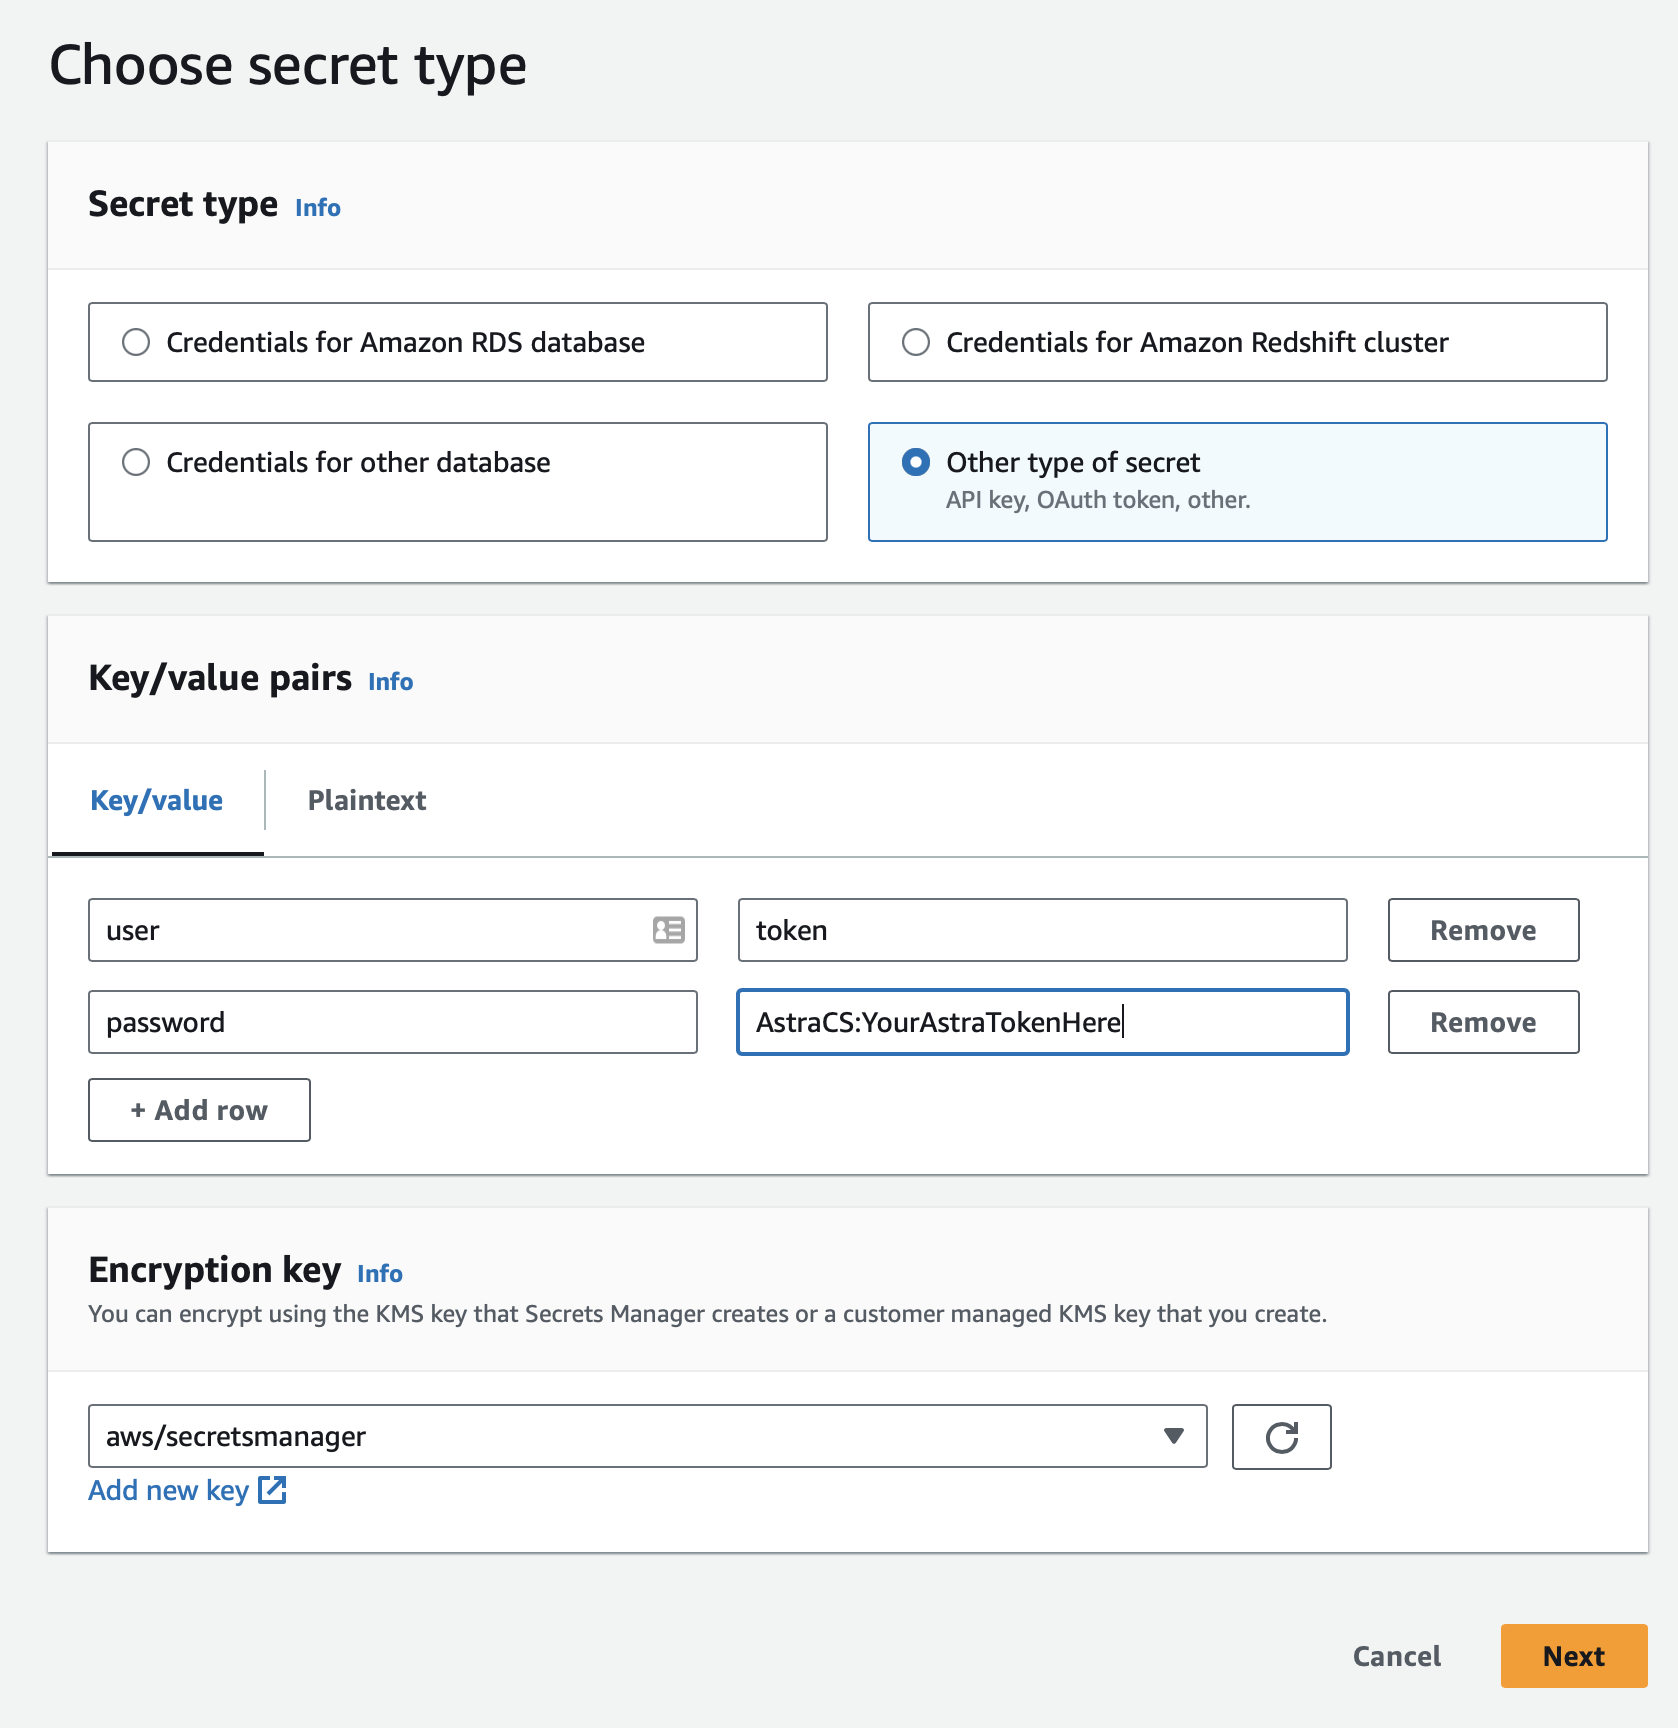
- Choose Other type of secret.
- Add key/value pairs for user and password:
- user:
token - password: Your AstraCS token here
Show me!
- user:
- Click the orange Next button at the bottom of the page.
- Choose a secret name like "AstraGlueCreds" and click Next.
- On the "Configure Rotation" screen just click Next.
- Review the entries then click Store.
Ok, that was a lot of steps, great job getting things set up. Feel free to take a moment before moving on to the next section.
Step 2 - Glue Connector
Now that all of the pieces have been put in place, it's time to create the connector and connection from Astra to Glue.
✅ Step 2.1: Create Glue Connector
- Open the AWS Glue Studio console.
- In the left hand column, click on Data connections.
- Click on Create custom connector in the "Custom connectors" section.
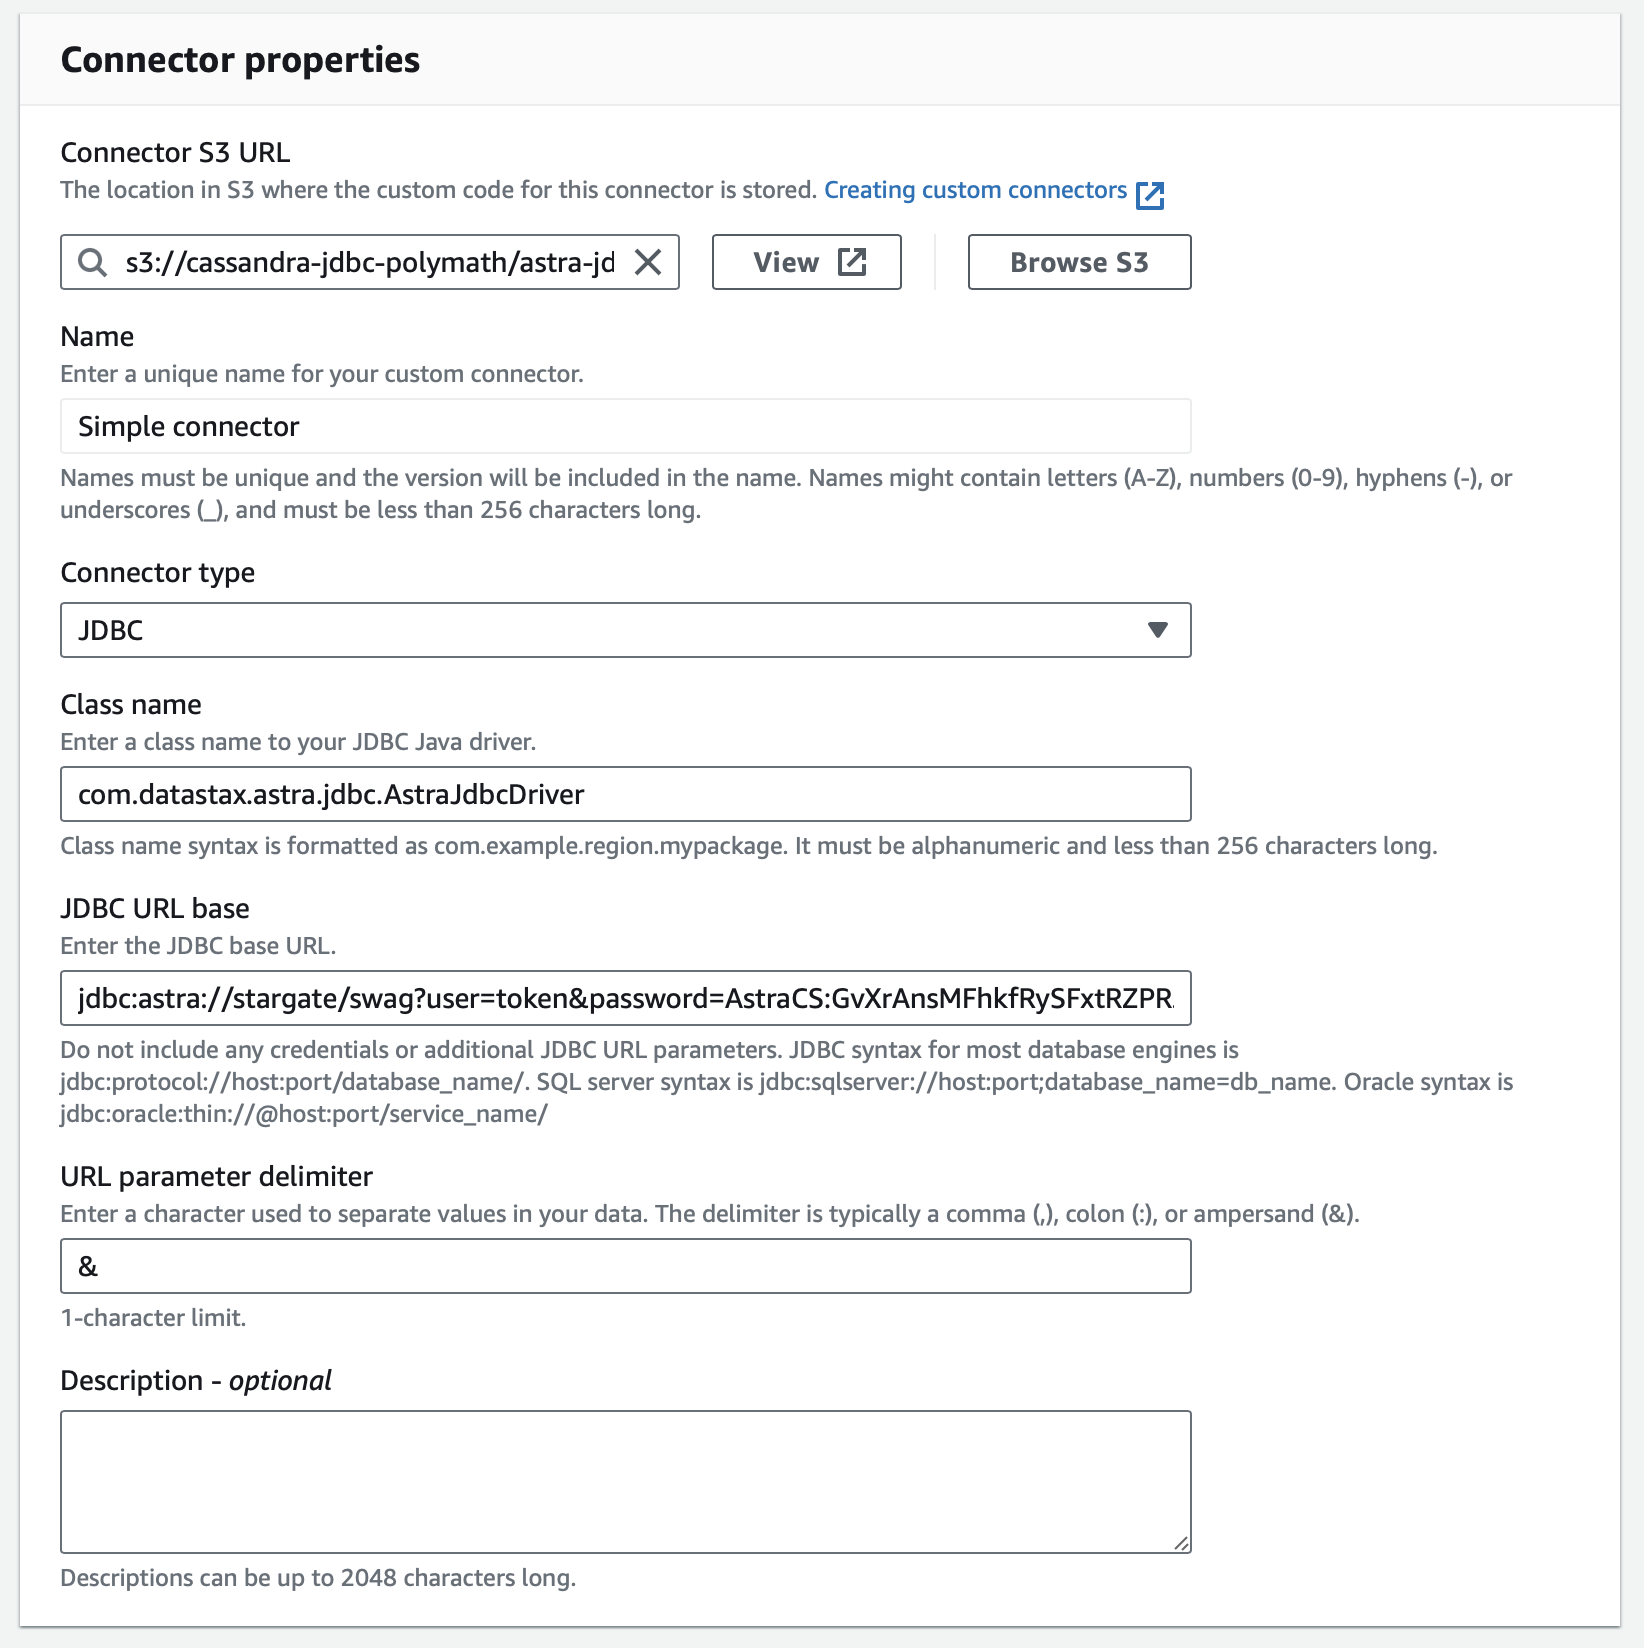
- Paste the S3 URI for your JDBC driver under Connector S3 URL. If you need to retrieve this URI you can find it by browsing from the S3 Console.
- Choose a Name for your connector.
- Select JDBC as the connector type.
- For the Class name enter com.datastax.astra.jdbc.AstraJdbcDriver.
- The JDBC URL base is composed of the following pieces
- jdbc:astra://
/ ?user=token&password= - If you followed the instructions on naming your db and keyspace it will be:
- jdbc:astra://astraglue_db/astraglue_ks?user=token&password=AstraCS:YourTokenHere
- (yes, this is the same username/password you used in the secrets manager, just go with it)
- jdbc:astra://
- For the URL parameter delimiter enter '&'.
Show me!
- Click Create connector.
✅ Step 2.2: Create Connection
From the Connectors page (Data connections in the left panel):
- Click on your connector name in the central Connectors section.
- Click the Create connection button.
- Enter a Name for your connection.
- Under Connection credential type select "default".
- Under AWS Secret - optional choose the secret you created during setup.
- Click the Create connection button at the bottom of the page.
Step 3 - Job setup
3.1 - Job details
From the Connectors page (Data connections in the left panel):
- Click on your connection name in the central Connections section.
- Click the orange Create job button.
- Enter a name for the job at the top of the console
- Click on the node with your connection name in the visual editor.
- Under Table name enter "demographics".
- Click the Data preview tab on the right hand side of the page.
- Click Start data preview session to start the data transfer.
- Wait for it to complete. You should see the data from the original Astra database here. This indicates that the extraction of the data from Astra has successfully completed.
- Click the Output schema tab on the right side of the page. Choose Use datapreview schema.
3.3 - Transform
- Click the ApplyMapping node in the visual editor.
- Under Transform you will see the fields from the Connection node.
- Output schema shows the schema it will send forward.
- Data preview shows the data.
Click Save at the upper right of the page to save your work for later.
Step 4 - Load into Glue Tables
At this point your data has been loaded into the system and you can use any load node going forward; if you wish to load your data into a Glue database and table, move on to the next step
4.1 - Create buckets
A Glue database requires a separate S3 bucket for storing your data.
- Open the S3 Console.
- Create a new empty bucket for Glue to use (see the steps above during setup for details). Name it something memorable for you, like
astradatabase.
4.2 - Create database and table
- In the AWS Glue console, choose Data Catalog/Databases from the left column.
- Click the orange Add database button at the top right
- Name your database and click the orange Create database button at the bottom.
- Click on Tables in the left hand panel.
- Click Add table.
- Name your table whatever you like.
- Choose the database you just created.
- Data store is S3:
- Browse and select the S3 bucket you created, with a slash at the end (you may need to click outside the box for it to accept your entry). The prefix is not needed for this entry.
- Data format is 'CSV' with Comma(,) as the delimiter.
- Click Next.
- Next is Choose or define schema.
- Download the Schema
- Click Edit schema as JSON.
- Click Choose file and pick the schema.txt file you downloaded.
- Click Save then Next.
- Review the entry and then click Create.
4.3 - Add Glue Database target
- Open your job from the list of ETL entries(ETL Jobs on the Glue navbar).
- Select the ApplyMapping node.
- Click the big plus circle to add a new node to the flow.
- Click Data then collapse Sources and expand Targets.
- Choose the Glue Data Catalog target.
- For the Glue Data Catalog configure it in the right panel:
- Make sure the parent node is ApplyMapping.
- Choose your database and table.
- Save your job and click Run.
4.4 - View table (requires Athena)
- Click on Tables in the left hand column, under Data Catalog/Databases.
- Click Table data for the table you created/populated.
- Acknowledge the charges for Athena.
- You will be taken to the Athena console.
- If the Run button is not active:
- Go to the Settings tab in the editor.
- Click the Manage button.
- Click Browse S3 next to "Location of query result", locate the bucket you created earlier to store the Glue data, and click "Choose" to confirm.
- Click Save to leave the settings management and go back to the Editor tab of Athena.
- Check out the resulting data by clicking the Run button.