‣ DBeaver
- This article includes information that was originally written by Erick Ramirez on DataStax Community

Overview
DBeaver is a universal database management tool for everyone who needs to work with data in a professional way. With DBeaver you are able to manipulate with your data like in a regular spreadsheet, create analytical reports based on records from different data storages, export information in an appropriate format.
Prerequisites
- You should have an Astra account
- You should Create an Astra Database
- You should Have an Astra Token
- You should Download your Secure Connect Bundle
This article assumes you have installed DBeaver Community Edition on your laptop or PC. It was written for version 21.2.0 on MacOS but it should also work for the Windows version.
Astra Community JDBC Drivers
1. Download JDBC Driver
Download latest archive astra-jdbc-driver-x.y.jar from Github Release page
2. Configure the Connection
The following screenshot are done with Dbeaver lite on MACOS
Go the DBeaver download page and download the version associated with your laptop.
-
Open DBeaver application
-
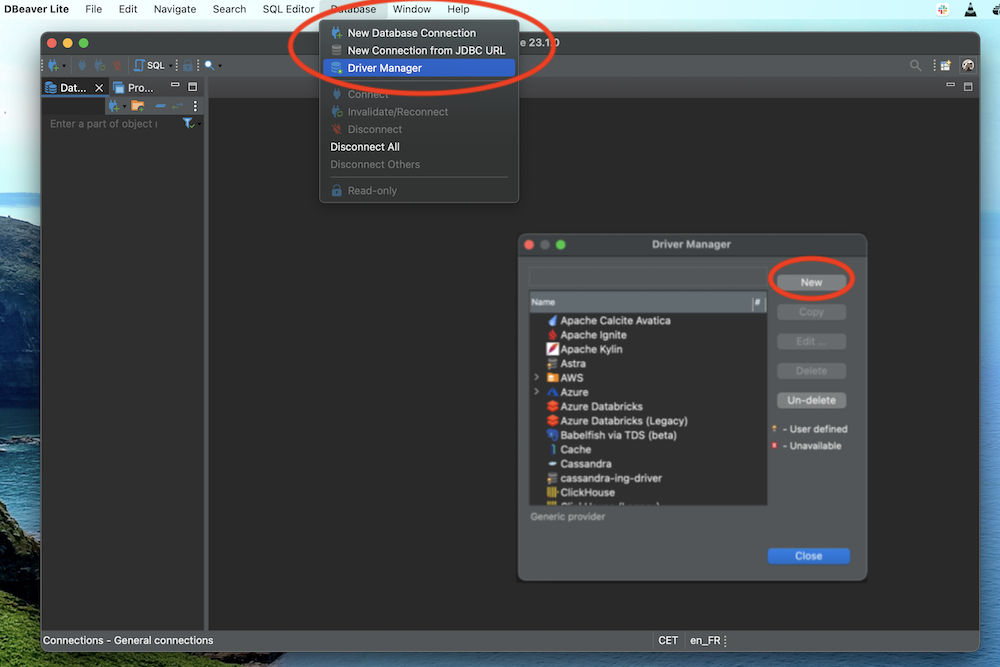
In the menu go
Database > Driver manager -
The Panel Click
newwithout selecting anything
- (1) Choose the TAB
libraries - (2) Select
Add File, look for the jar we just downloaded.

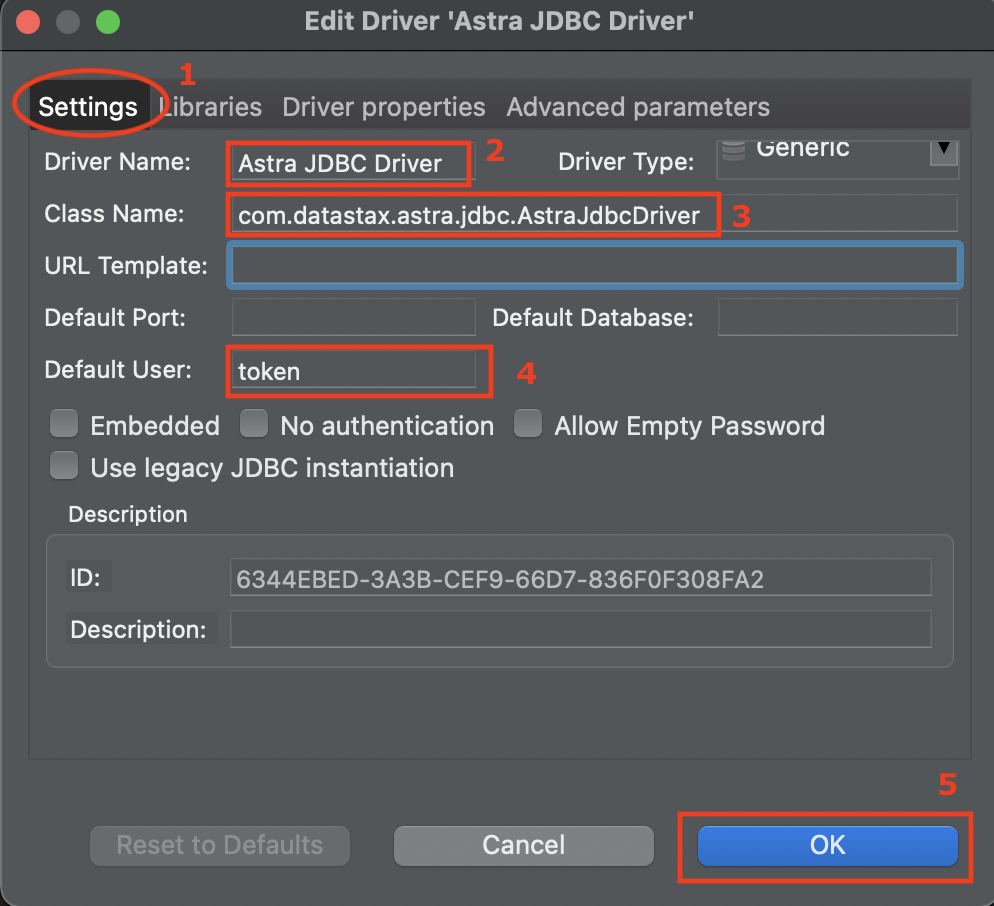
- (1) Go back to the tab
Settingsand enter the following values: - (2) Driver Name:
Astra JDBC Driverand driver Type:Generic - (3) Class Name:
com.datastax.astra.jdbc.AstraJdbcDriver - (4) Username is
token - (5) Save your modifications with
[OK]
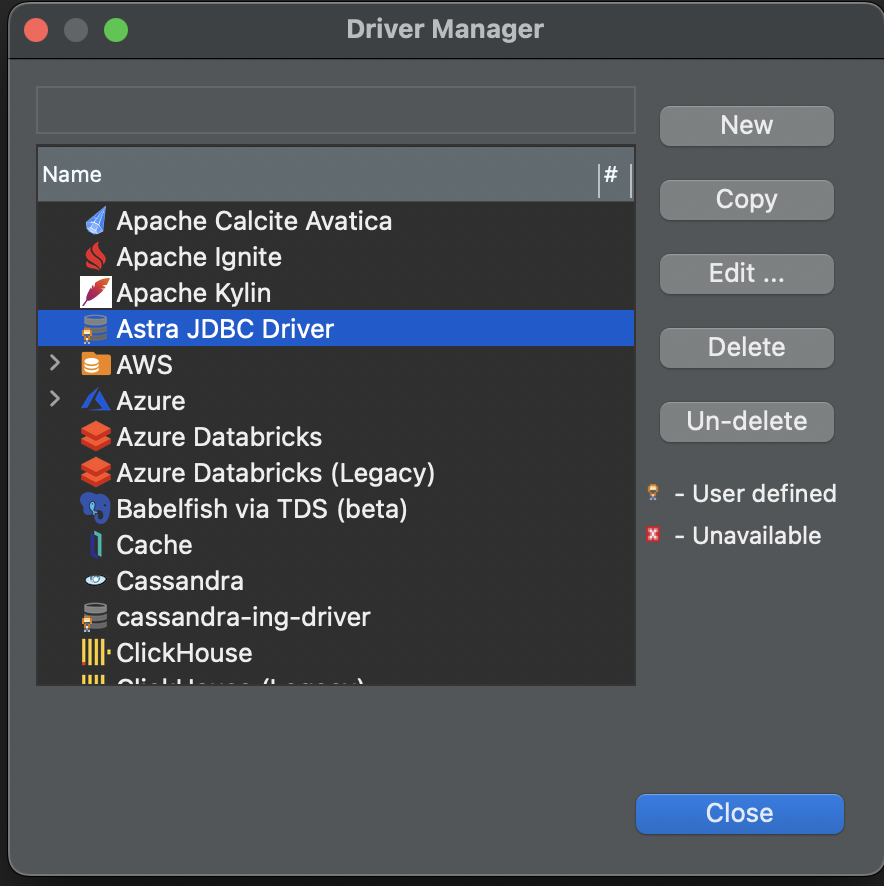
- You have new entry in the list of drivers called
Astra JDBC Driver
3. Create the DataSource
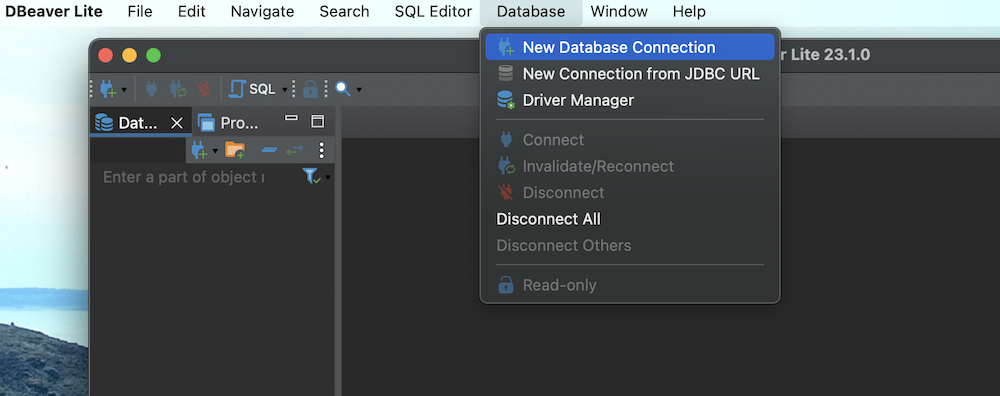
- In the menu now select
Database > New Database Collection
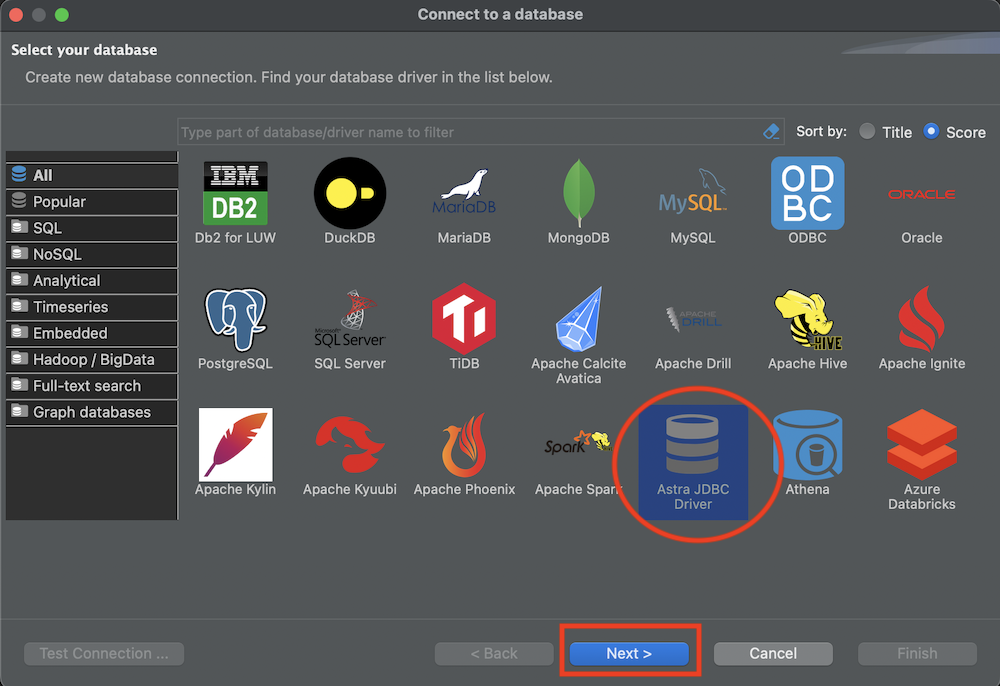
- Pick the driver
Astra JDBC Driverand clickNext
-
Populate the URL as follow:
jdbc:astra://<db>/<keyspace>?region=<region> -
Populate your token value (it should start by
AstraCS:...)
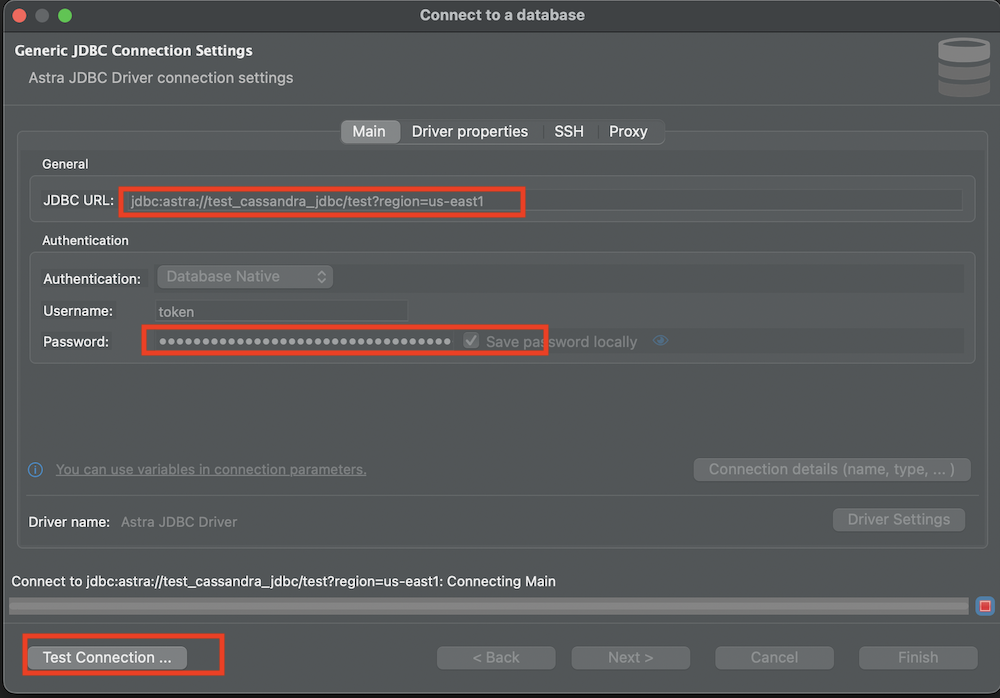
- Click on
Test Connectionand validate withFinish

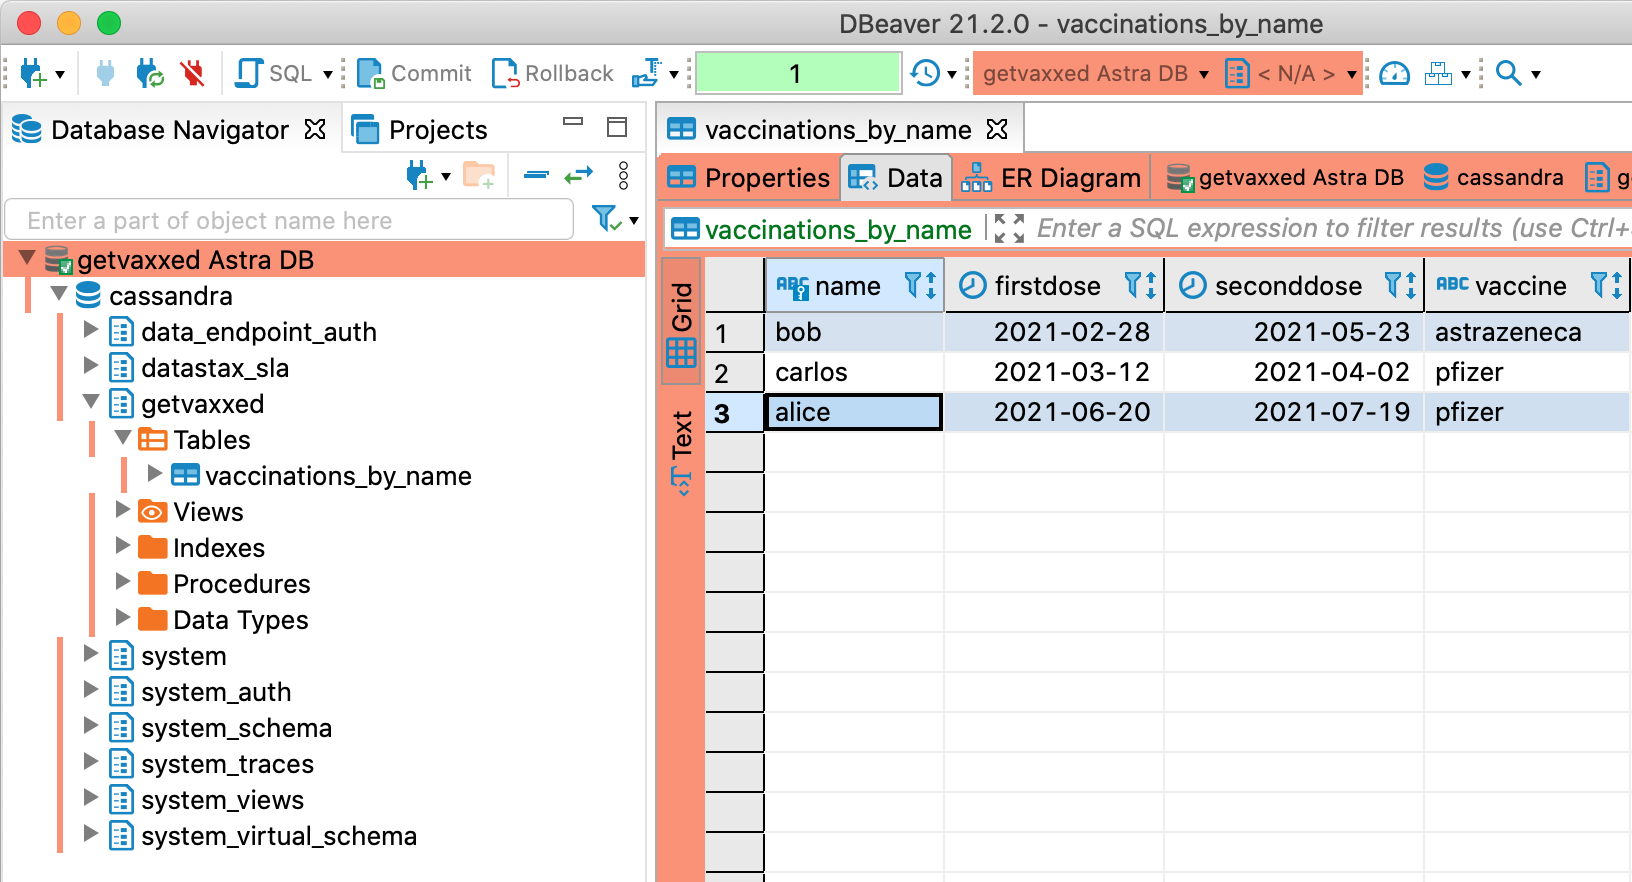
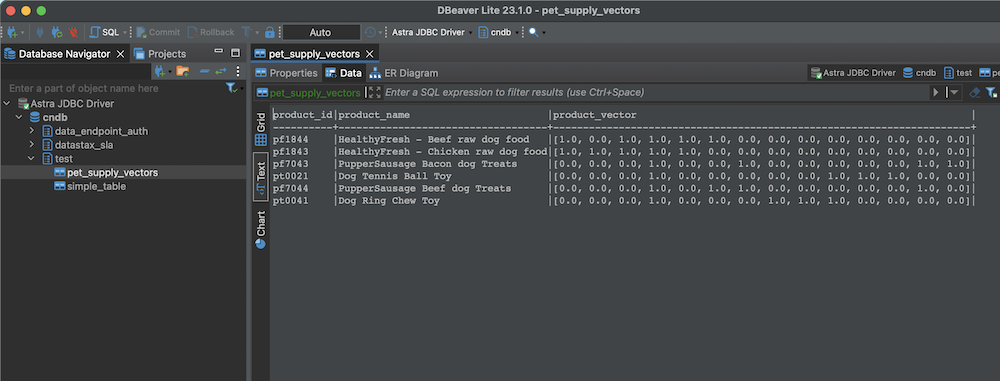
4. Use DataSource
- On the left panel you can now see your data
Using JDBC Simba Drivers
1. Download JDBC Driver
Download the JDBC driver from the DataStax website:
- Go to https://downloads.datastax.com/#odbc-jdbc-drivers.
- Select Simba JDBC Driver for Apache Cassandra.
- Select JDBC 4.2.
- Read the license terms and accept it (click the checkbox).
- Hit the blue Download button.
- Once the download completes, unzip the downloaded file.
2. Import Driver
- Go to the Driver Manager.
- Click the New button.
- In the Libraries tab, click the Add File button.
- Locate the directory where you unzipped the driver download and add the
CassandraJDBC42.jarfile. - Click the Find Class button which should identify the driver class as
com.simba.cassandra.jdbc42.Driver. -
In the Settings tab, set the following:
-
Driver Name:
Astra DB - Driver Type:
Generic -
Class Name:
com.simba.cassandra.jdbc42.Driver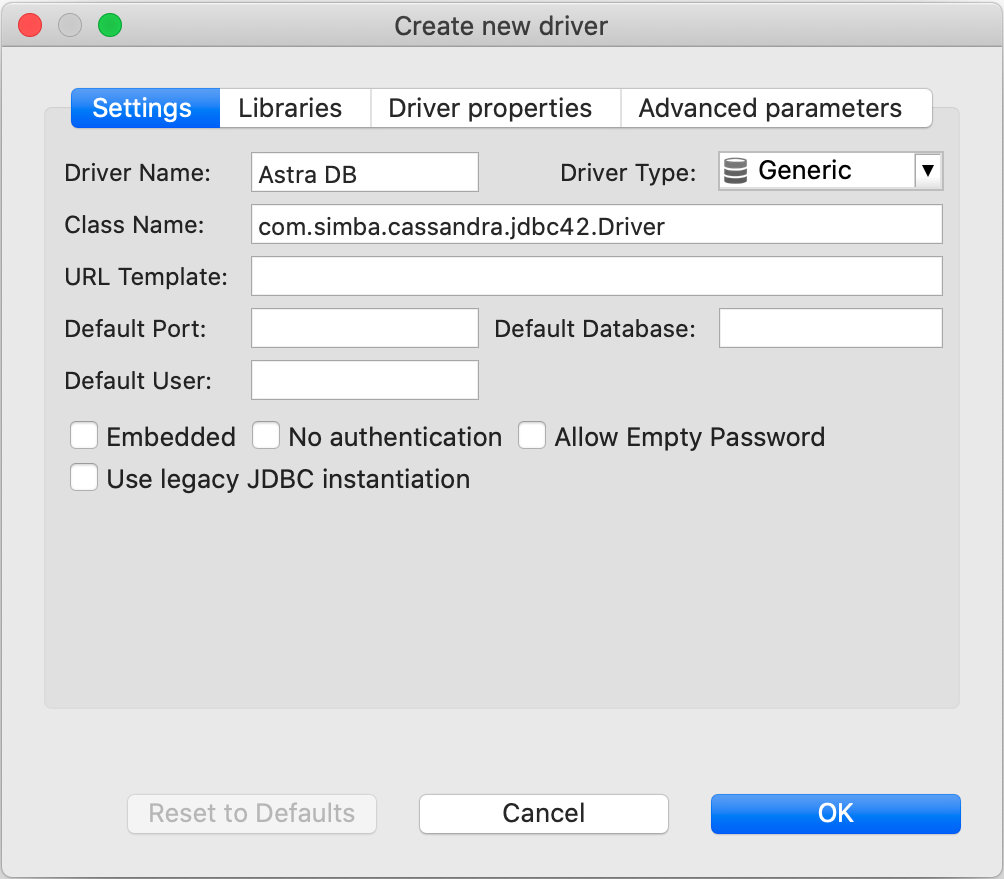
-
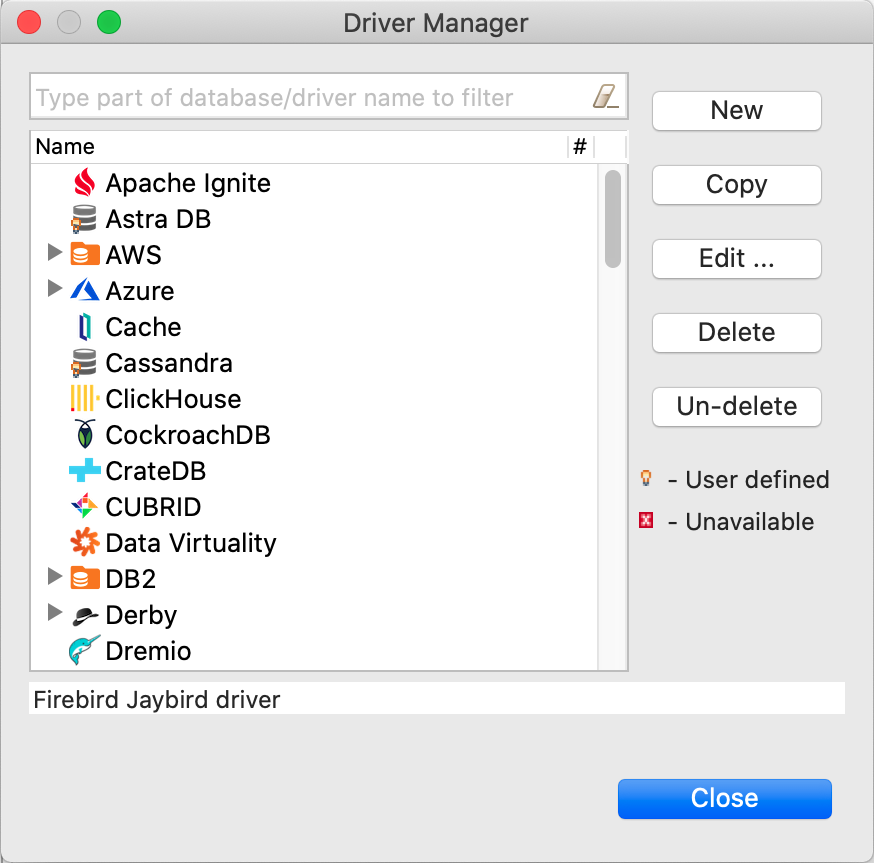
Click the OK button to save the driver
At this point, you should see Astra DB as one of the drivers on the list:
3. Create New Connection
Connect to your Astra DB in DBeaver:
- Open the New Database Connection dialog box.
- Select Astra DB from the list of drivers.
- In the Main tab, set the JDBC URL to:
jdbc:cassandra://;AuthMech=2;TunableConsistency=6;SecureConnectionBundlePath=/path/to/secure-connect-dbeaver.zipNote That you will need to specify the full path to your secure bundle. - In the Username field, enter the string
token -
In the Password field, paste the value of the token you created in the Prerequisites section above. The token looks like
AstraCS:AbC...XYz:123...edf0.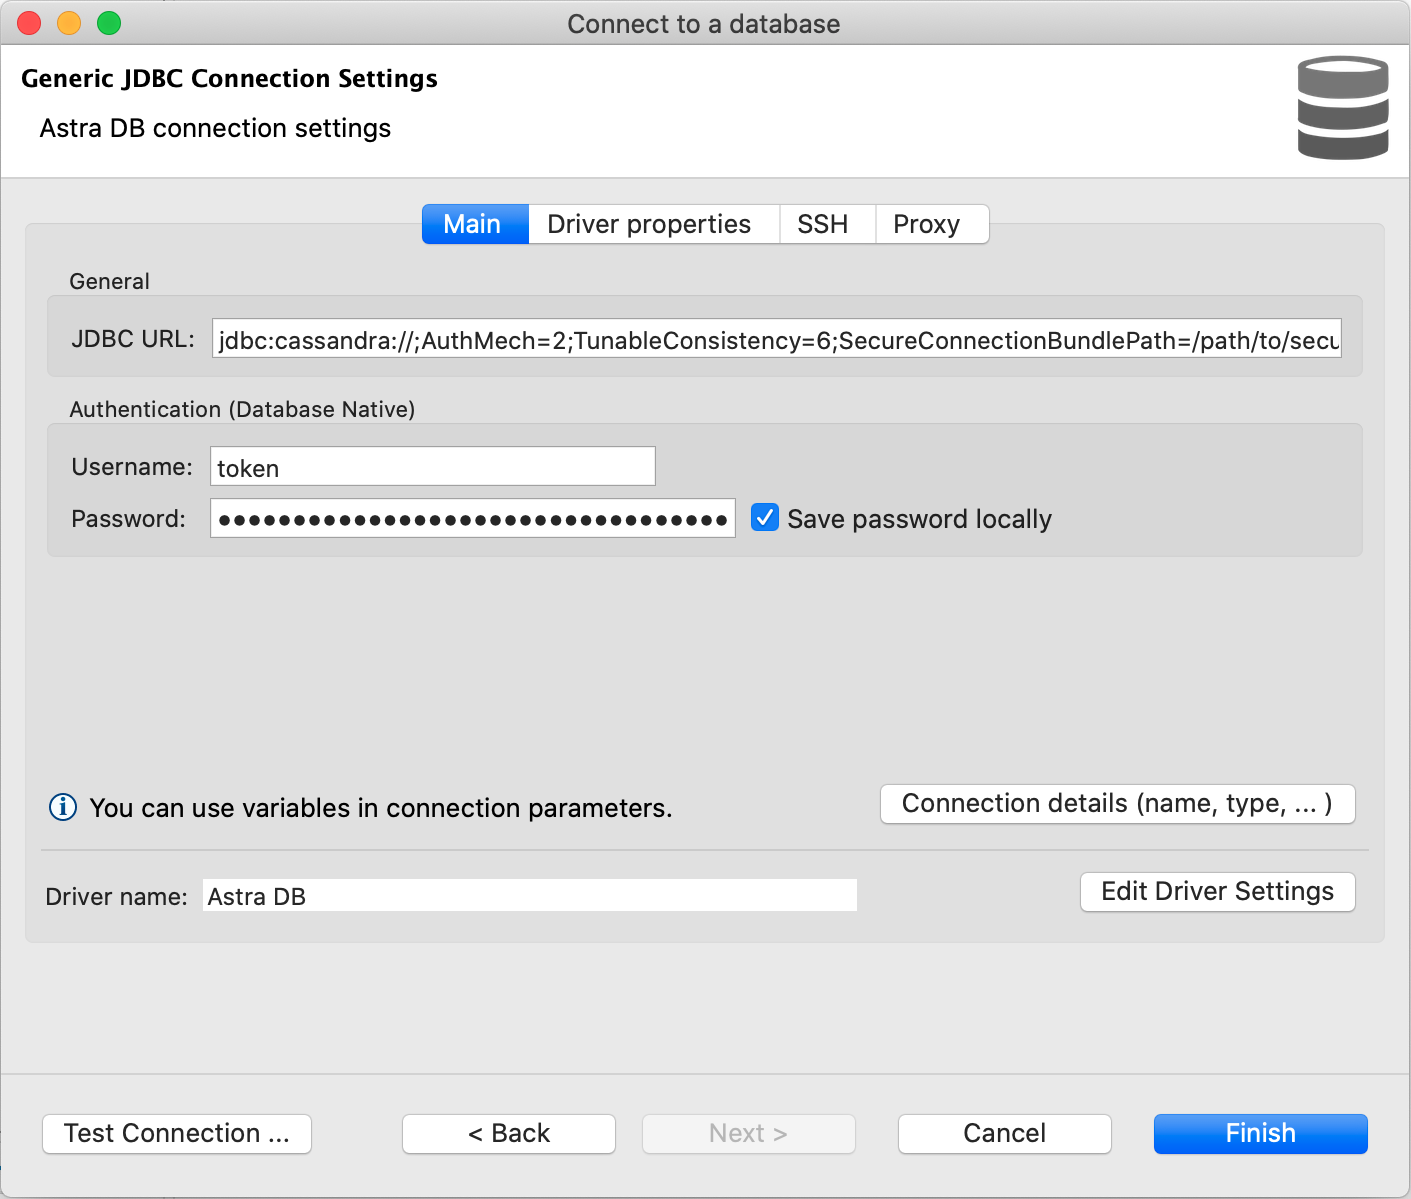
-
Click on the Connection details button
- In Connection name field, give your DB connection a name:

- Click the Finish button
- Click on the Test Connection button to confirm that the driver configuration is working:
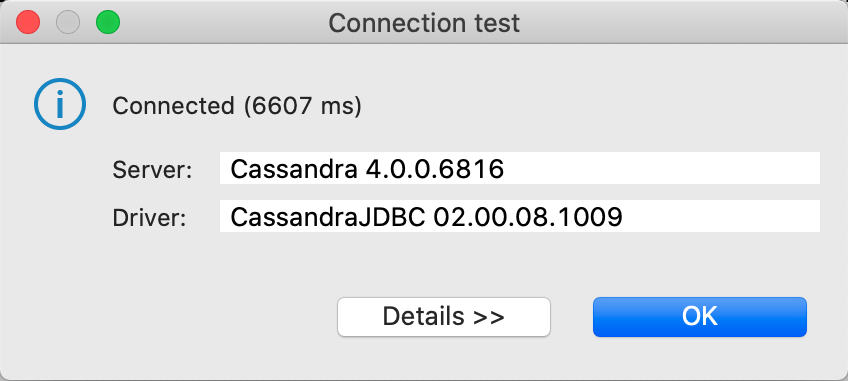
4. Final Test
Connect to your Astra DB. If the connection was successful, you should be able to explore the keyspaces and tables in your DB on the left-hand side of the UI.
Here's an example output: