‣ Create Token
A - Overview
A page also exists in the Astra Reference Documentation
As stated in the Create Account page, the security token is associated to one and only one organization and only one role. There are a set of predefined roles within an organization which are associated with some default permissions. The full list of permissions and roles is available in the Astra Documentation.
Default roles available for a token:
Administrator User
Organization Administrator
Billing Administrator
Database Administrator
UI View Only
Administrator Service Account
Read/Write Service Account
Read Only Service Account
Read/Write User
Read Only User
API Administrator User
API Read Only Service Account
API Read/Write User
API Administrator Service Account
API Read/Write Service Account
API Read Only User
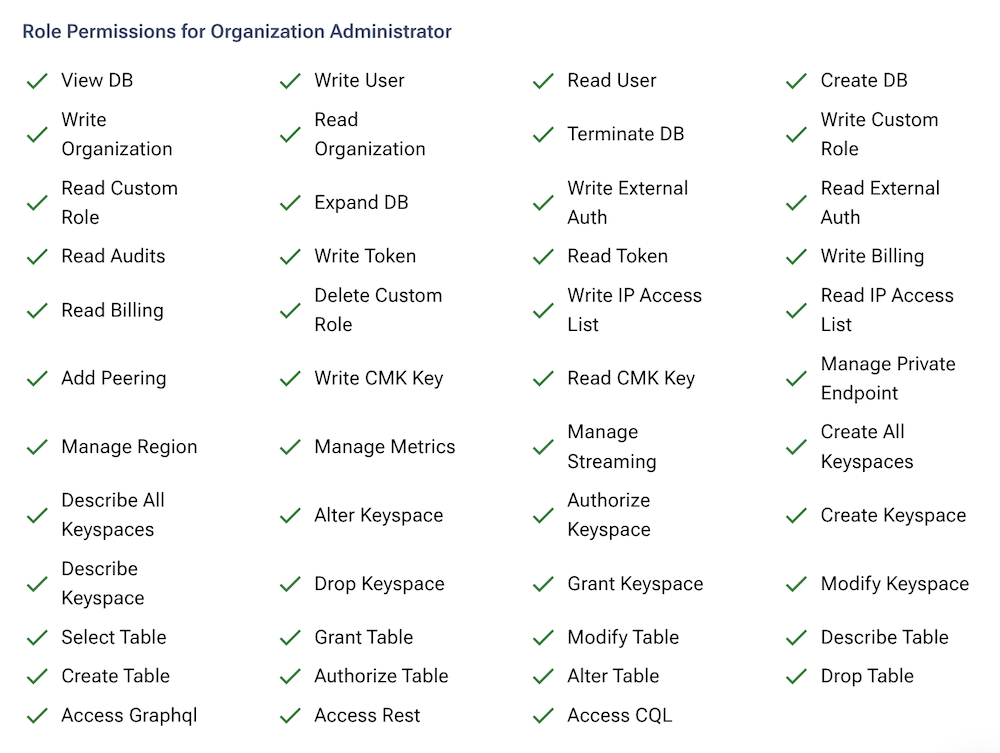
Permissions for a role (here Organization Administrator got access to everything)
Custom Roles
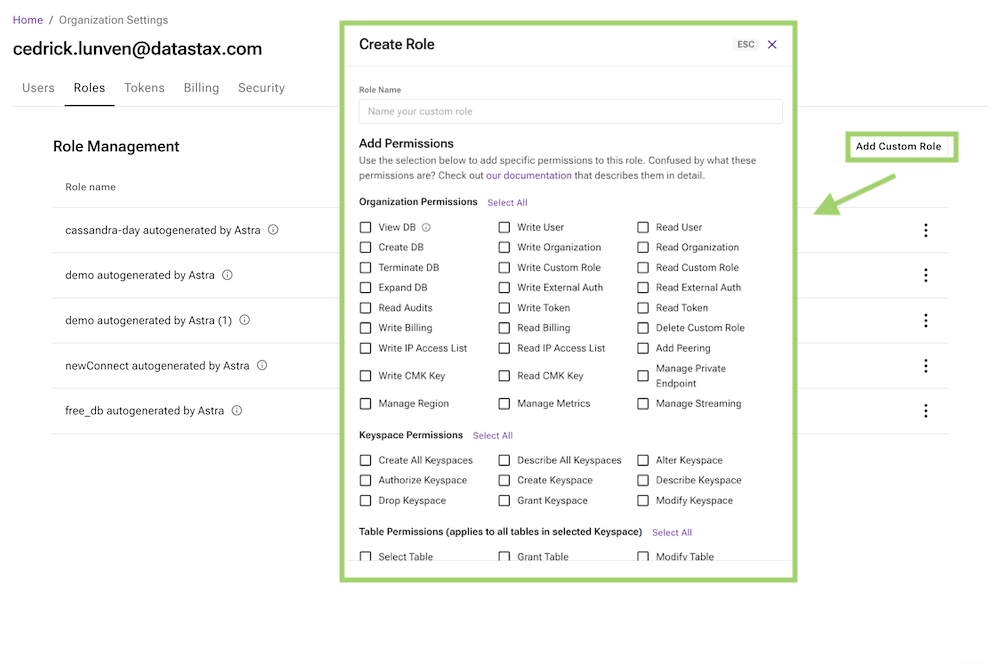
It is possible to manually create custom roles and tune the corresponding permissions in a fine-grained fashion (Settings / Role Management), to later create tokens based on them.
For example, each time a database is created, it comes with an autogenerated brand-new token, backed by an ad-hoc custom role essentially scoped to that database only.
B - Prerequisites
To create a new token:
- You should have an Astra account
C - Procedure
Note that a token, albeit with a fixed set of permissions, is generated automatically for you as a database is created. In many cases, however, you need to manually issue tokens, and here is explained how to do that.
1️⃣ First go to the Organization settings panel in one of the following ways:
Settings page
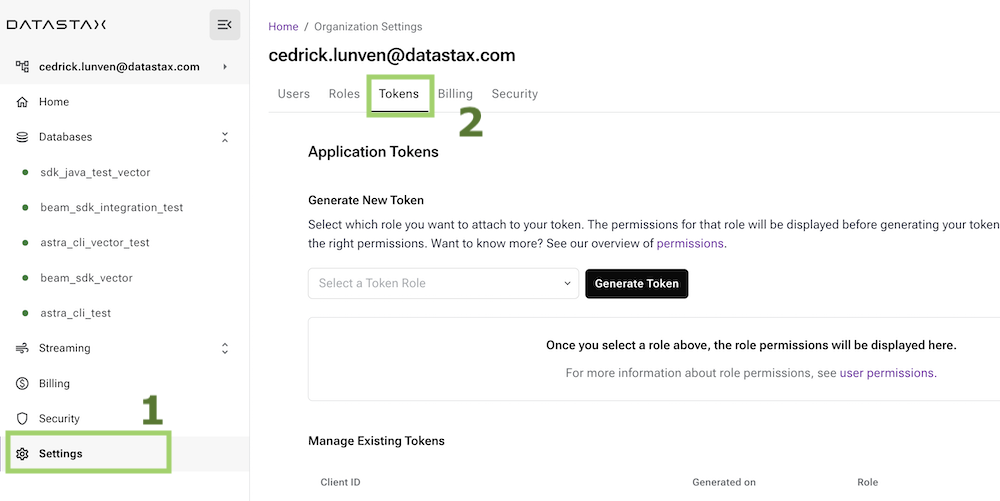
On the bottom-right corner of the Astra UI, in the navigation bar, click on "Settings" next to the cog icon. (The navigation bar might be collapsed to the left). Then, select the "Token management" entry in the Settings menu.
From a database
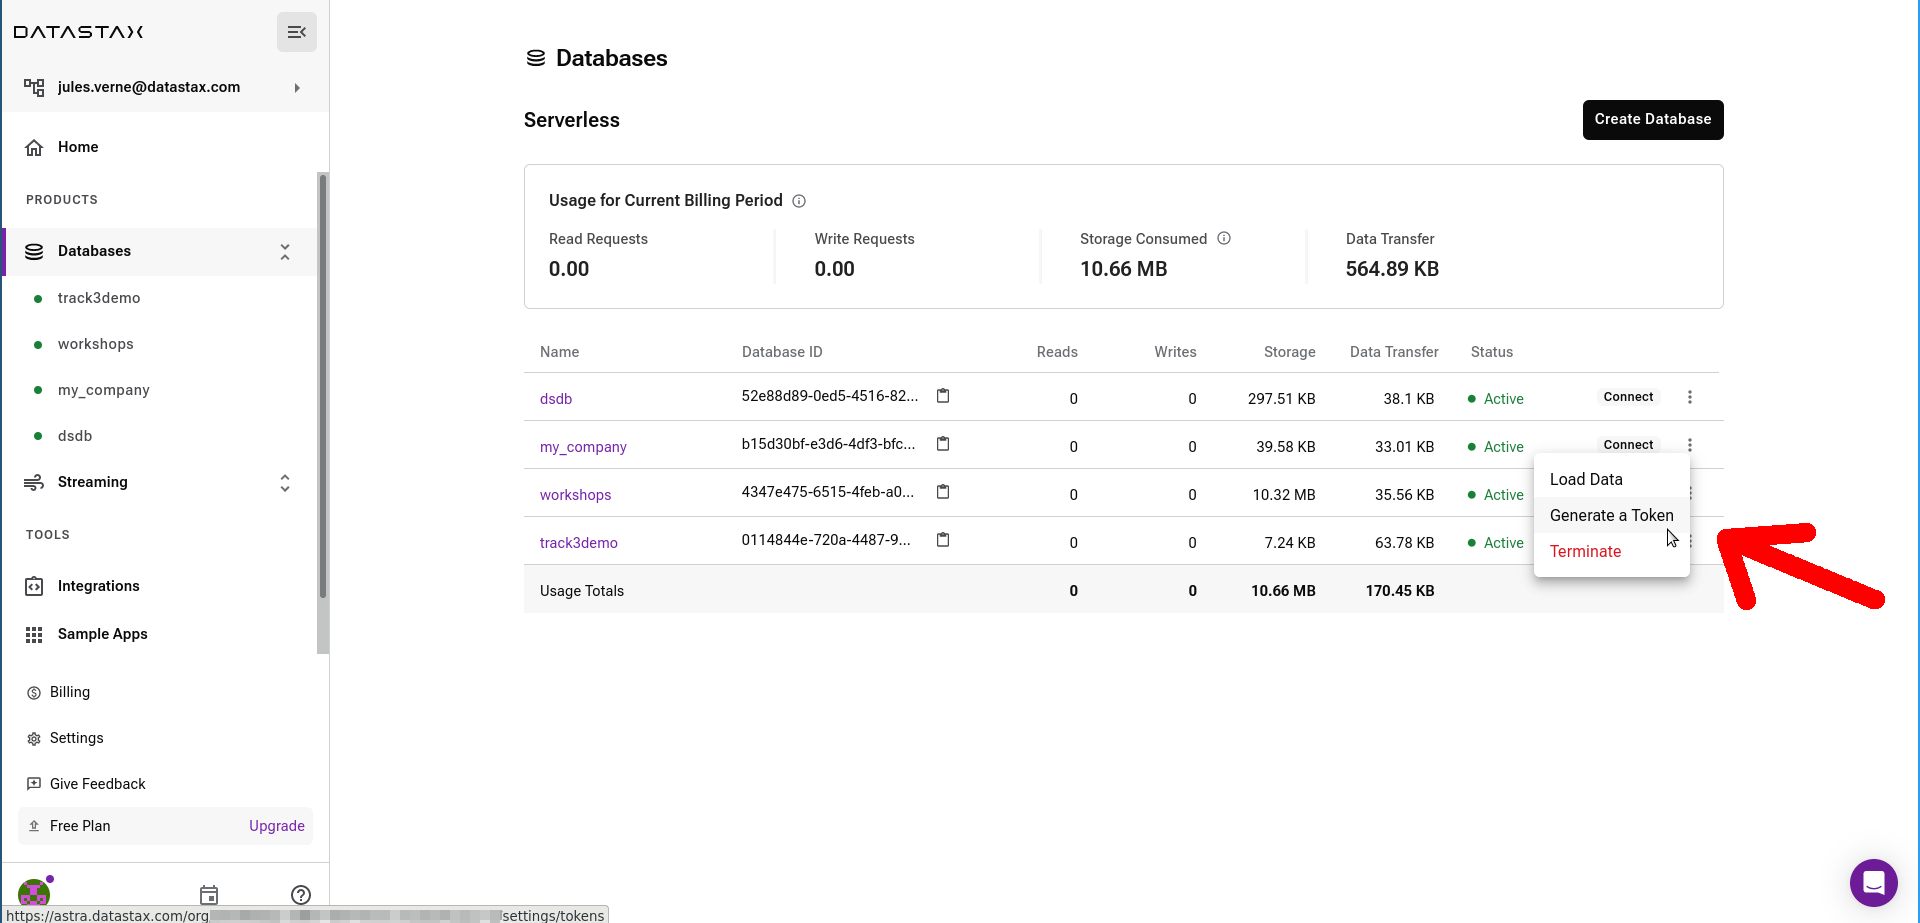
Click on the "..." next to a database in the main DB dashboard, then select "Generate a Token".
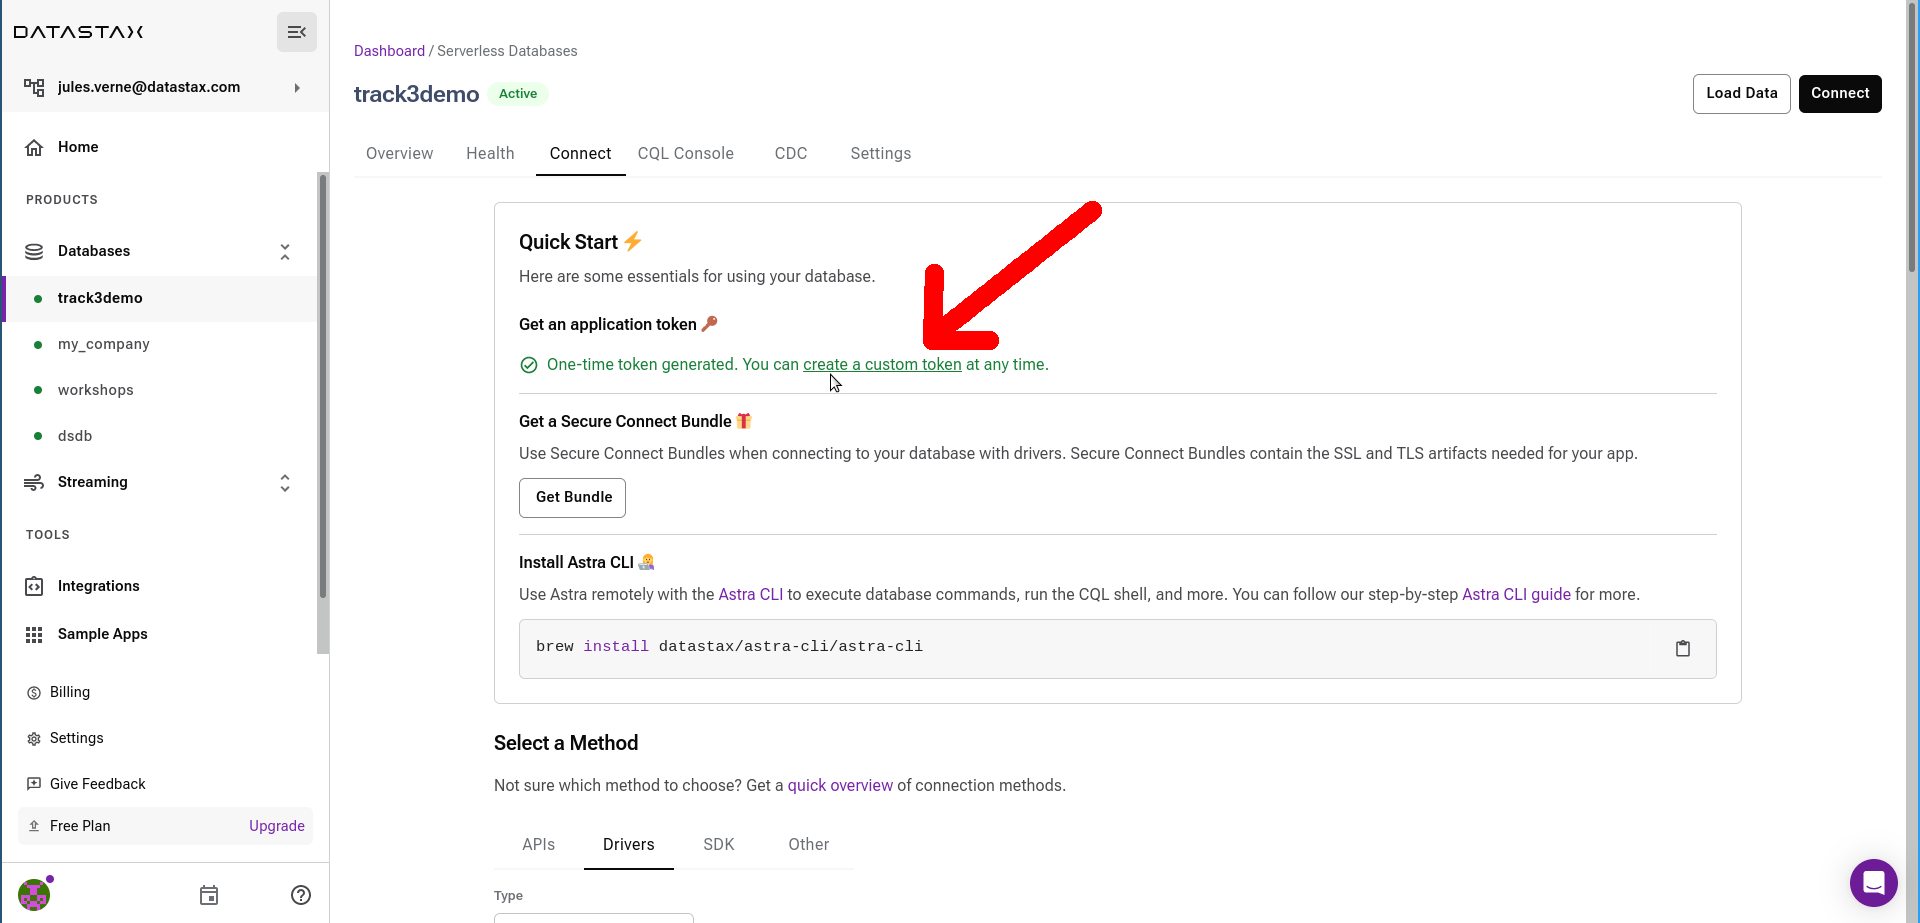
From the Connect tab
On the Connect tab of your database, click on the "create a custom token" link in the Quickstart section.
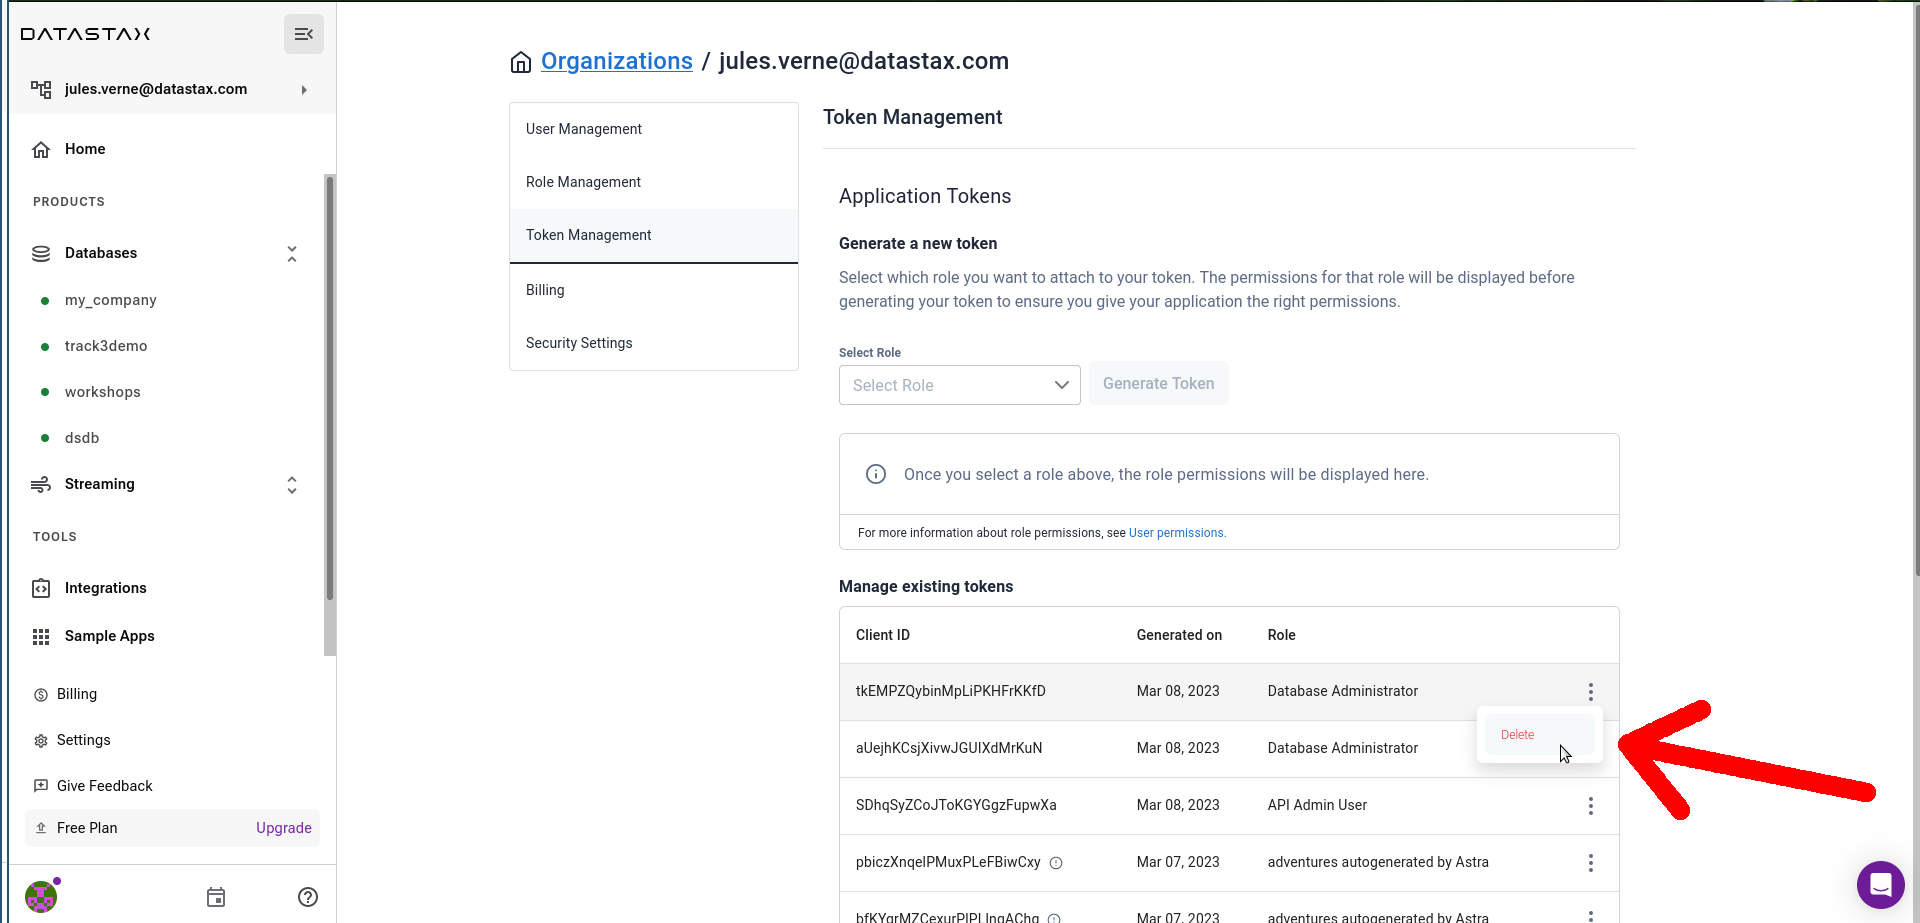
2️⃣ Pick the desired role for the token in the drop-down list and click "Generate".

3️⃣ A new token is generated for you. Make sure to copy/download the values before leaving the page, since the secrets will not be shown anymore. You can copy the individual secrets with the button next to the text fields, or directly download the whole token as a file and store it safely.
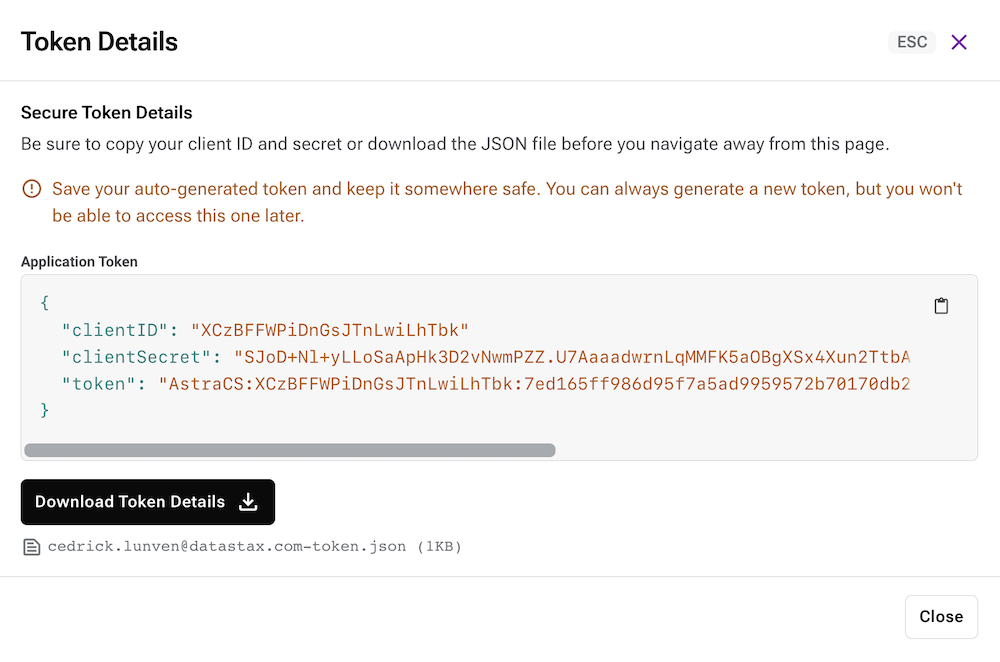
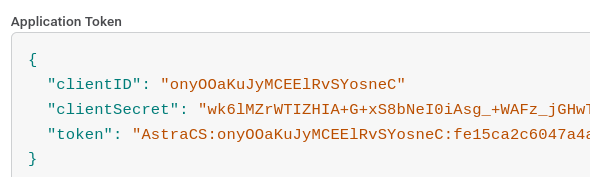
Anatomy of a Token
The Token is in fact three separate strings: a Client ID, a Client Secret and the token proper. You will need some of these strings to access the database, depending on the type of access you plan. Although the Client ID, strictly speaking, is not a secret, you should regard this whole object as a secret and make sure not to share it inadvertently (e.g. committing it to a Git repository) as it grants access to your databases.
4️⃣ The token will not expire, unless you decide to revoke (i.e. delete) it, for example in case it is compromised. To do so, in the "Token Management" page, click on the "..." menu next to the token you want to delete.
Reference Documentation and resources