‣ TablePlus

- This article includes information that was originally written by Erick Ramirez on DataStax Community
Overview
TablePlus is a modern, native tool with elegant UI that allows you to simultaneously manage multiple databases such as MySQL, PostgreSQL, SQLite, Microsoft SQL Server and more.
Prerequisites
- You should have an Astra account
- You should Create an Astra Database
- You should Have an Astra Token
- You should Download your Secure bundle
This article assumes you have a running installation of Tableplus on your laptop or PC. It was written for the MacOS version but it should also work for the Windows version.
Installation and Setup
Note
For simplicity, the secure connect bundle has been placed in /path/to/scb
✅ Step 1: DB Information
On your laptop or PC where Tableplus is installed, unpack your secure bundle. For example:
Here is an example file listing after unpacking the bundle:
Obtain information about your database from the config.json file. Here is an example:
{
  "host": "<YOUR_ENDPOINT>.db.astra.datastax.com",
  "port": 98765,
  "cql_port": 34567,
  "keyspace": "<KEYSPACE_NAME>",
  "localDC": "us-west-2",
  "caCertLocation": "./ca.crt",
  "keyLocation": "./key",
  "certLocation": "./cert",
  ...
}
We will use this information to configure Astra DB as the data source in Tableplus.
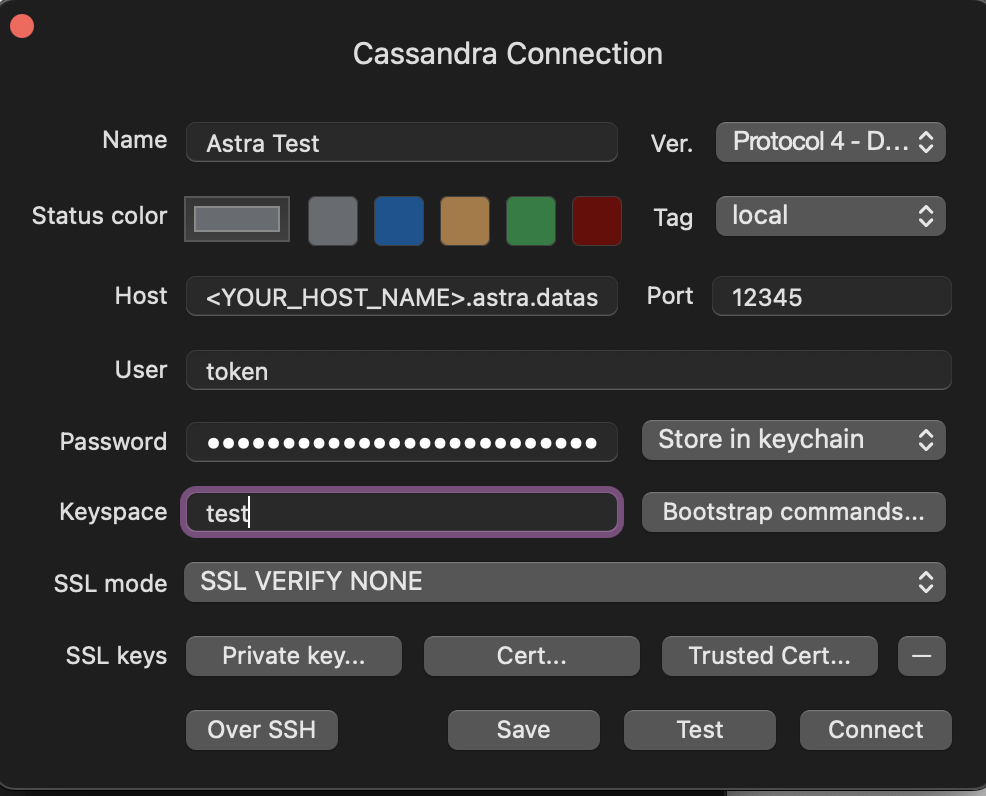
✅ Step 2: New Connection
-
In Tableplus, create a new connection and select Cassandra as the target database.
-
In the Host and Port fields, use the
hostandcql_portvalues in theconfig.jsonabove. -
In the User and Password fields, use the client ID and client secret from the token you created in the Prerequisites section of this article.
-
In the Keyspace field, use the
keyspacevalues in theconfig.jsonabove. -
Choose
SSL VERIFY NONEfor the SSL mode. -
For SSL keys, select the secure bundle files:
Secure Bundle Files
keyfor Private Key (leave the password blank when prompted)certfor Certca.crtfor Trusted Cert
Here's an example of what the Cassandra Connection dialog box should look like:
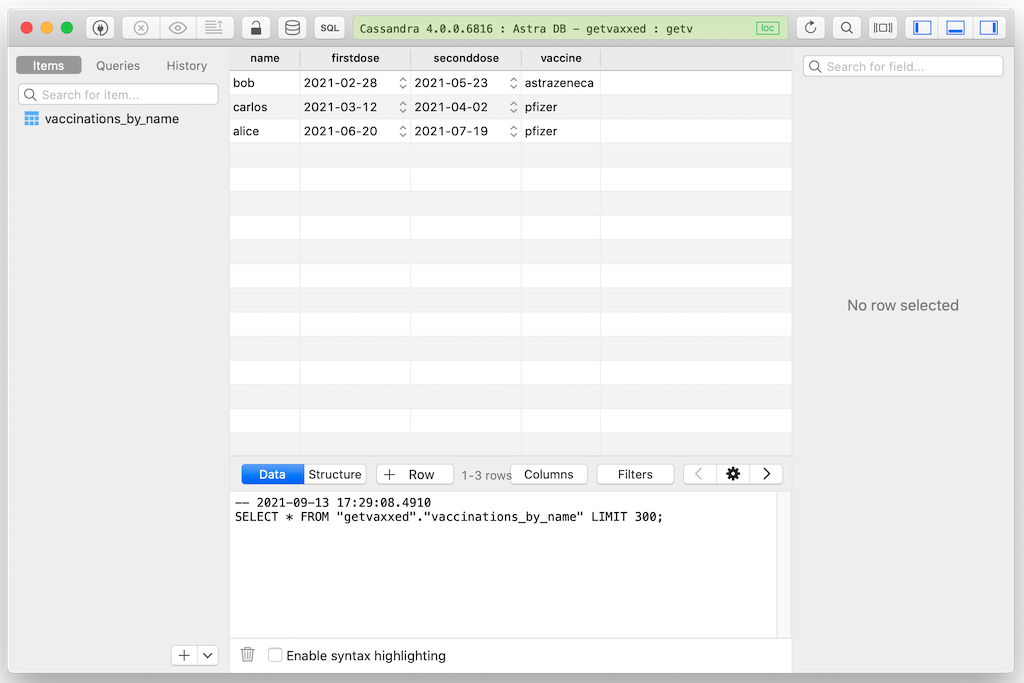
✅ Step 3: Final Test
Connect to your Astra DB. If the connection was successful, you should be able to see all the tables on the left-hand side of the UI.
Here's an example output: